Overview
- Sketch
- Collect sculpting materials
- Make tentacles
- Attach tentacles to the body
- Make and attach the suckers
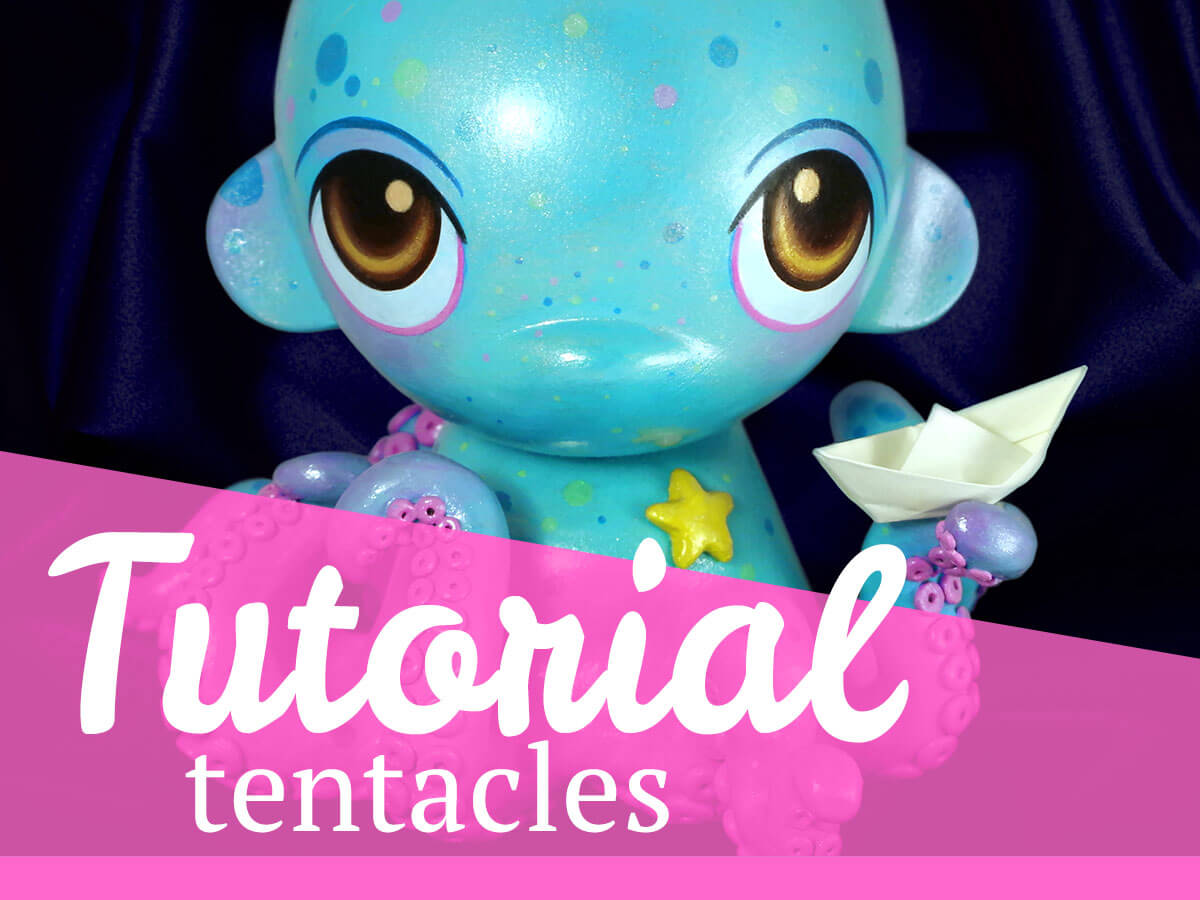
Several people have asked how I made my Tentacle Baby custom Foomi, so I have written a tutorial here with a focus on the most painstaking part – the tentacles. The longest step was making and attaching each of those little round suckers on the tentacles, but it paid off in the end!
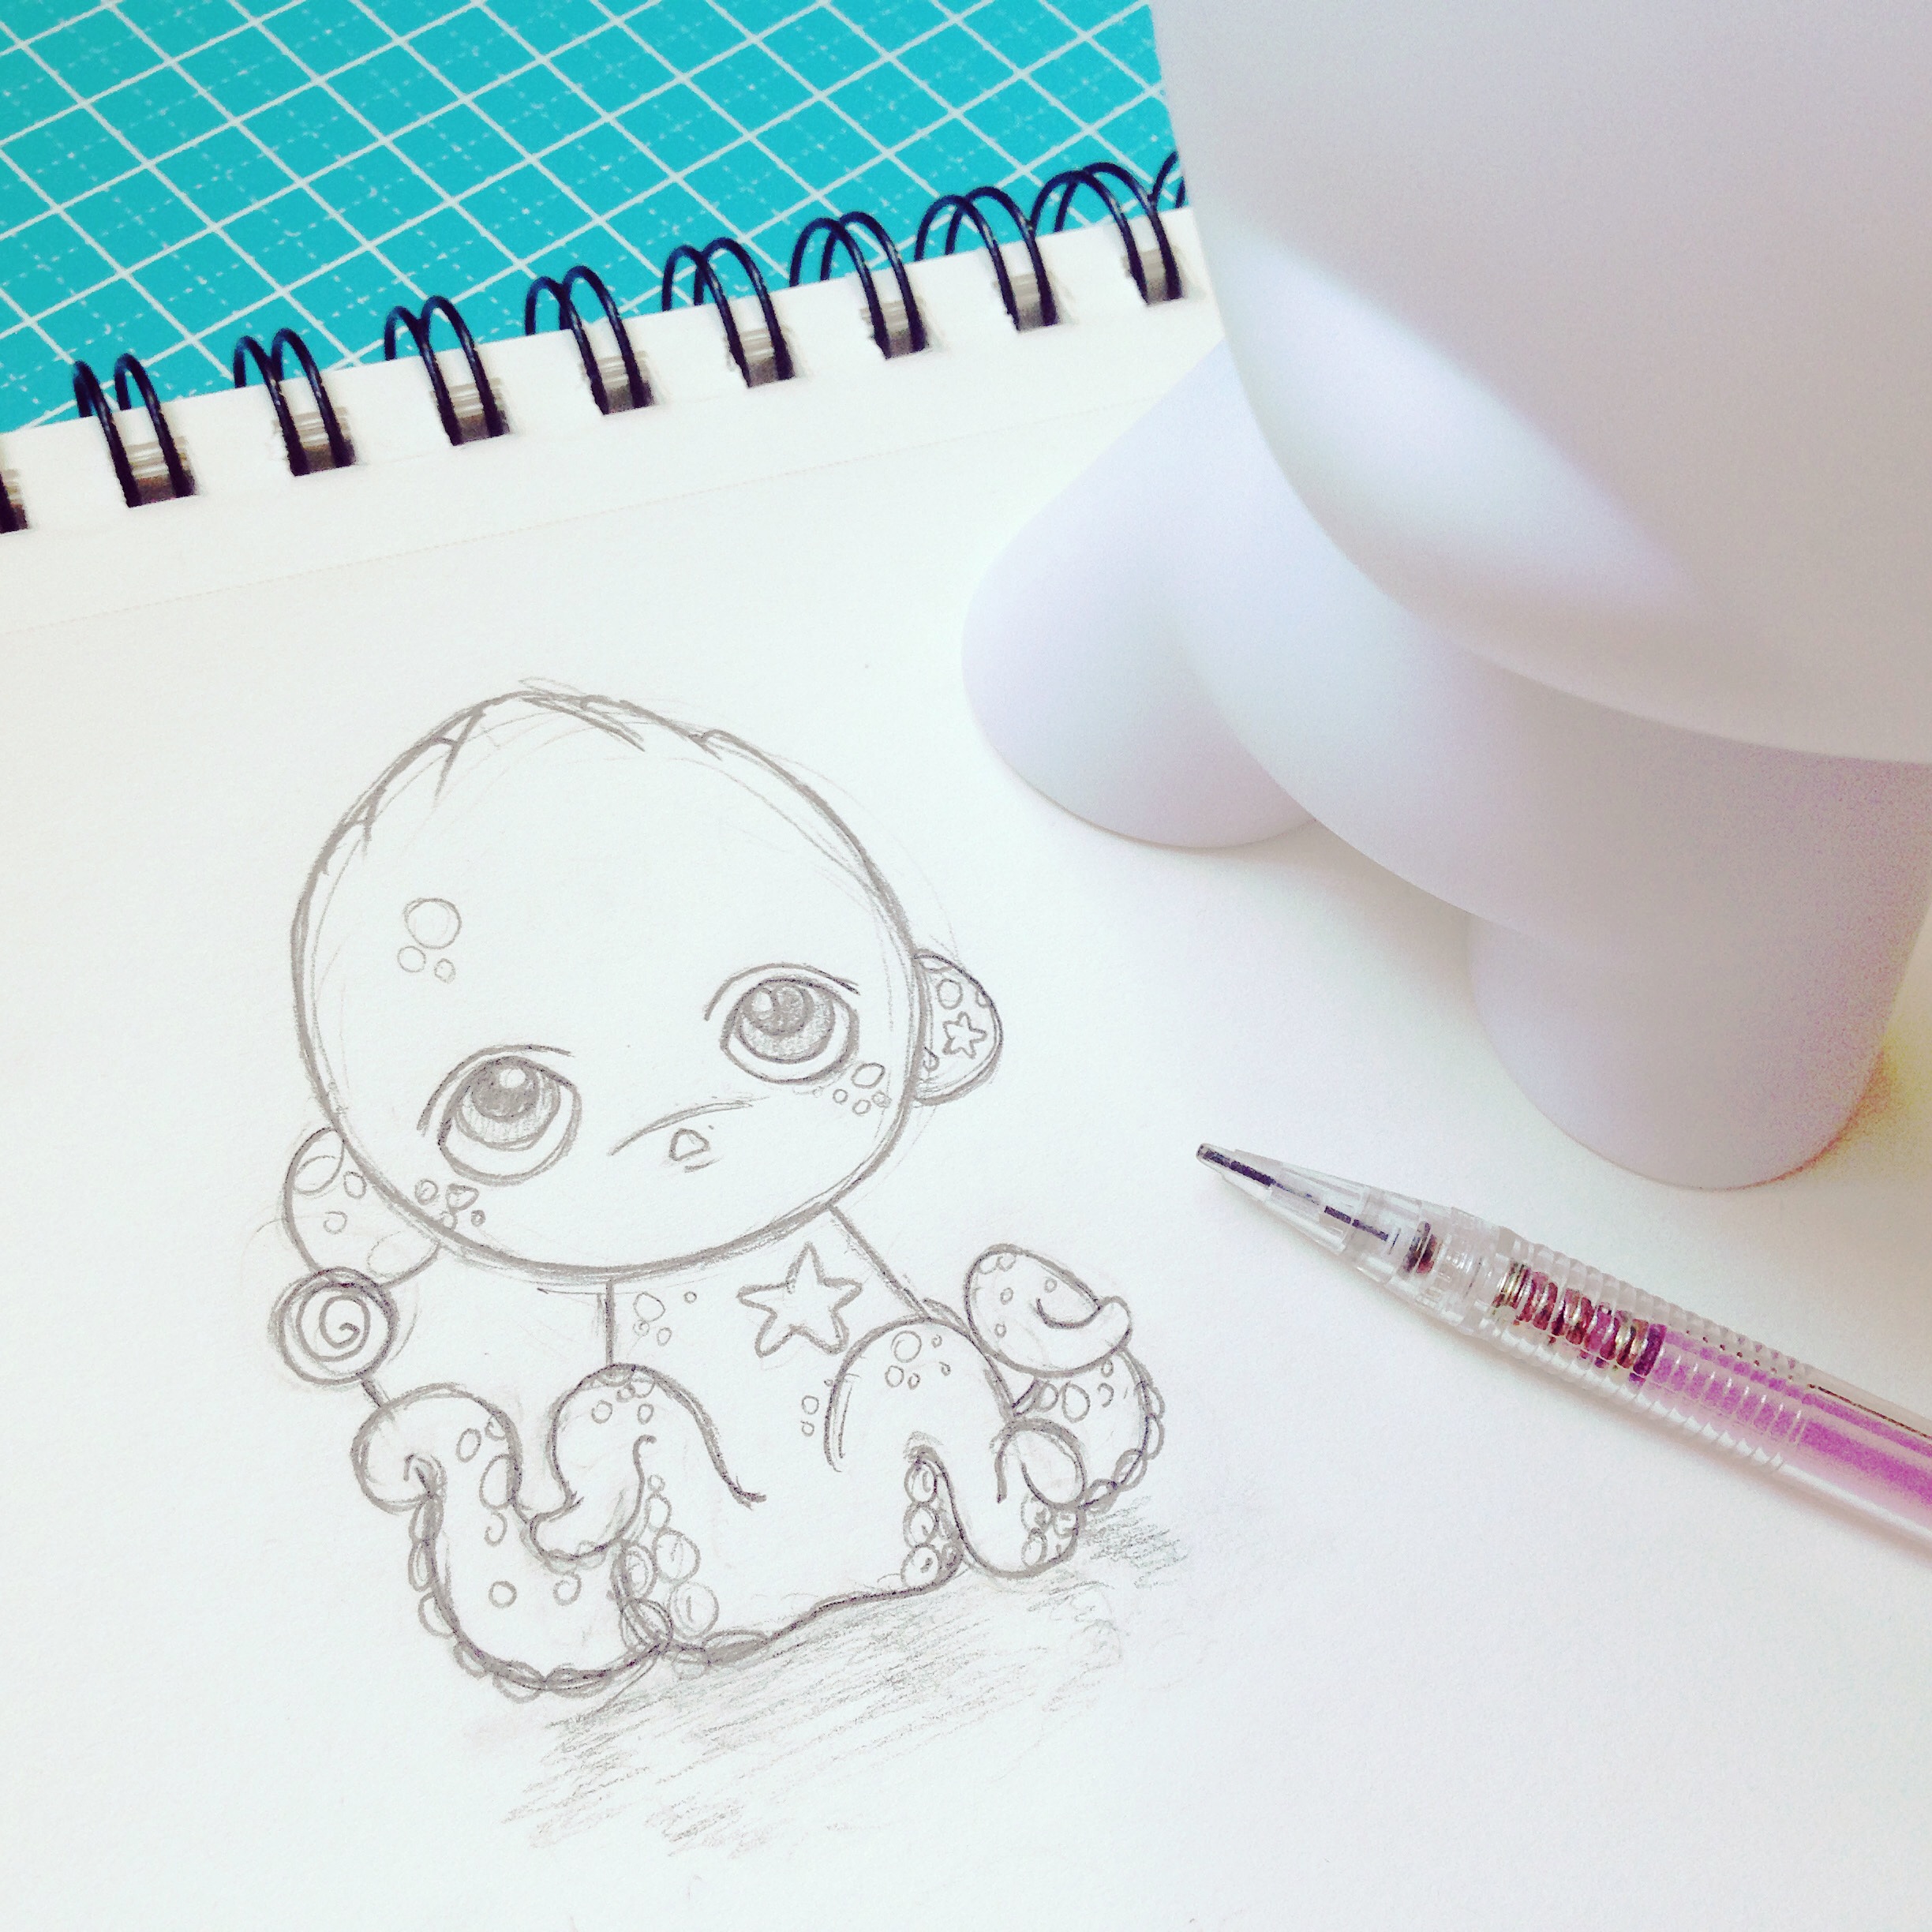
1. Sketch
As with any work of art, I usually start with a sketch. This helps me envision the final product and in this case, plan out the direction of the tentacles.
2. Collect sculpting materials
- A vinyl toy base
- Clay
- Sculpting tools
- Wire and/or aluminum foil (optional, see notes below)
Details about materials:
Vinyl toy base
You can use any vinyl toy as a base! I used a Kidrobot Foomi for this project.
Clay
I used Super Sculpey. In hindsight, I should have used a mixture of Super Sculpey and Super Sculpey Firm, as I have done in recent projects. Super Scupley alone was a bit too soft to hold the shape of the tentacles well without deforming under its own weight. I managed to get by with some ingenuity, but it would have been easier to use a firmer clay like Sculpey Firm to begin with. You can use Sculpey Firm alone or mix it with regular Sculpey. Mixing the two together yields a clay that is firm enough to hold more weight, yet malleable enough to sculpt with ease.
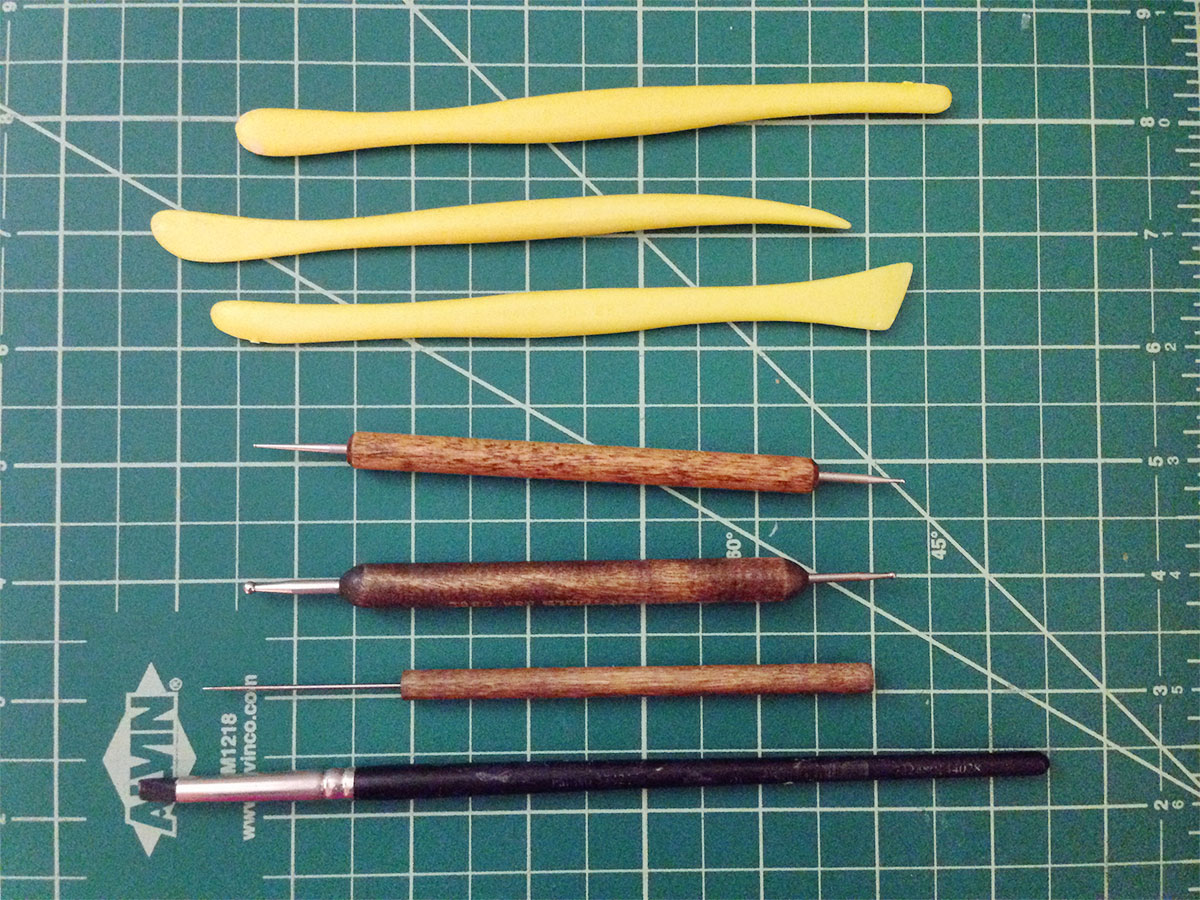
Sculpting tools
I’m not sure what these are all called, but here are the tools that I have. You can find any use for them, but I mainly use the flat yellow ones for smoothing. The ones with the balls at the tips are important for creating the suckers on the tentacles. If you don’t have a tool like that, you can use the end of a small paintbrush or a blunt pencil. The tool at the bottom has a rubber tip.
Wire and Aluminum Foil
For smaller sized projects this won’t be necessary, but I used a 7-inch Foomi as my base, so I knew that the tentacles were going to be pretty thick and needed extra support. The wire provides support so the tentacles don’t lose shape during sculpting and baking. The foil is additional support and filler material so I can save clay. It would have been entirely possible to make my tentacles without wire or foil, but it would have been much harder.
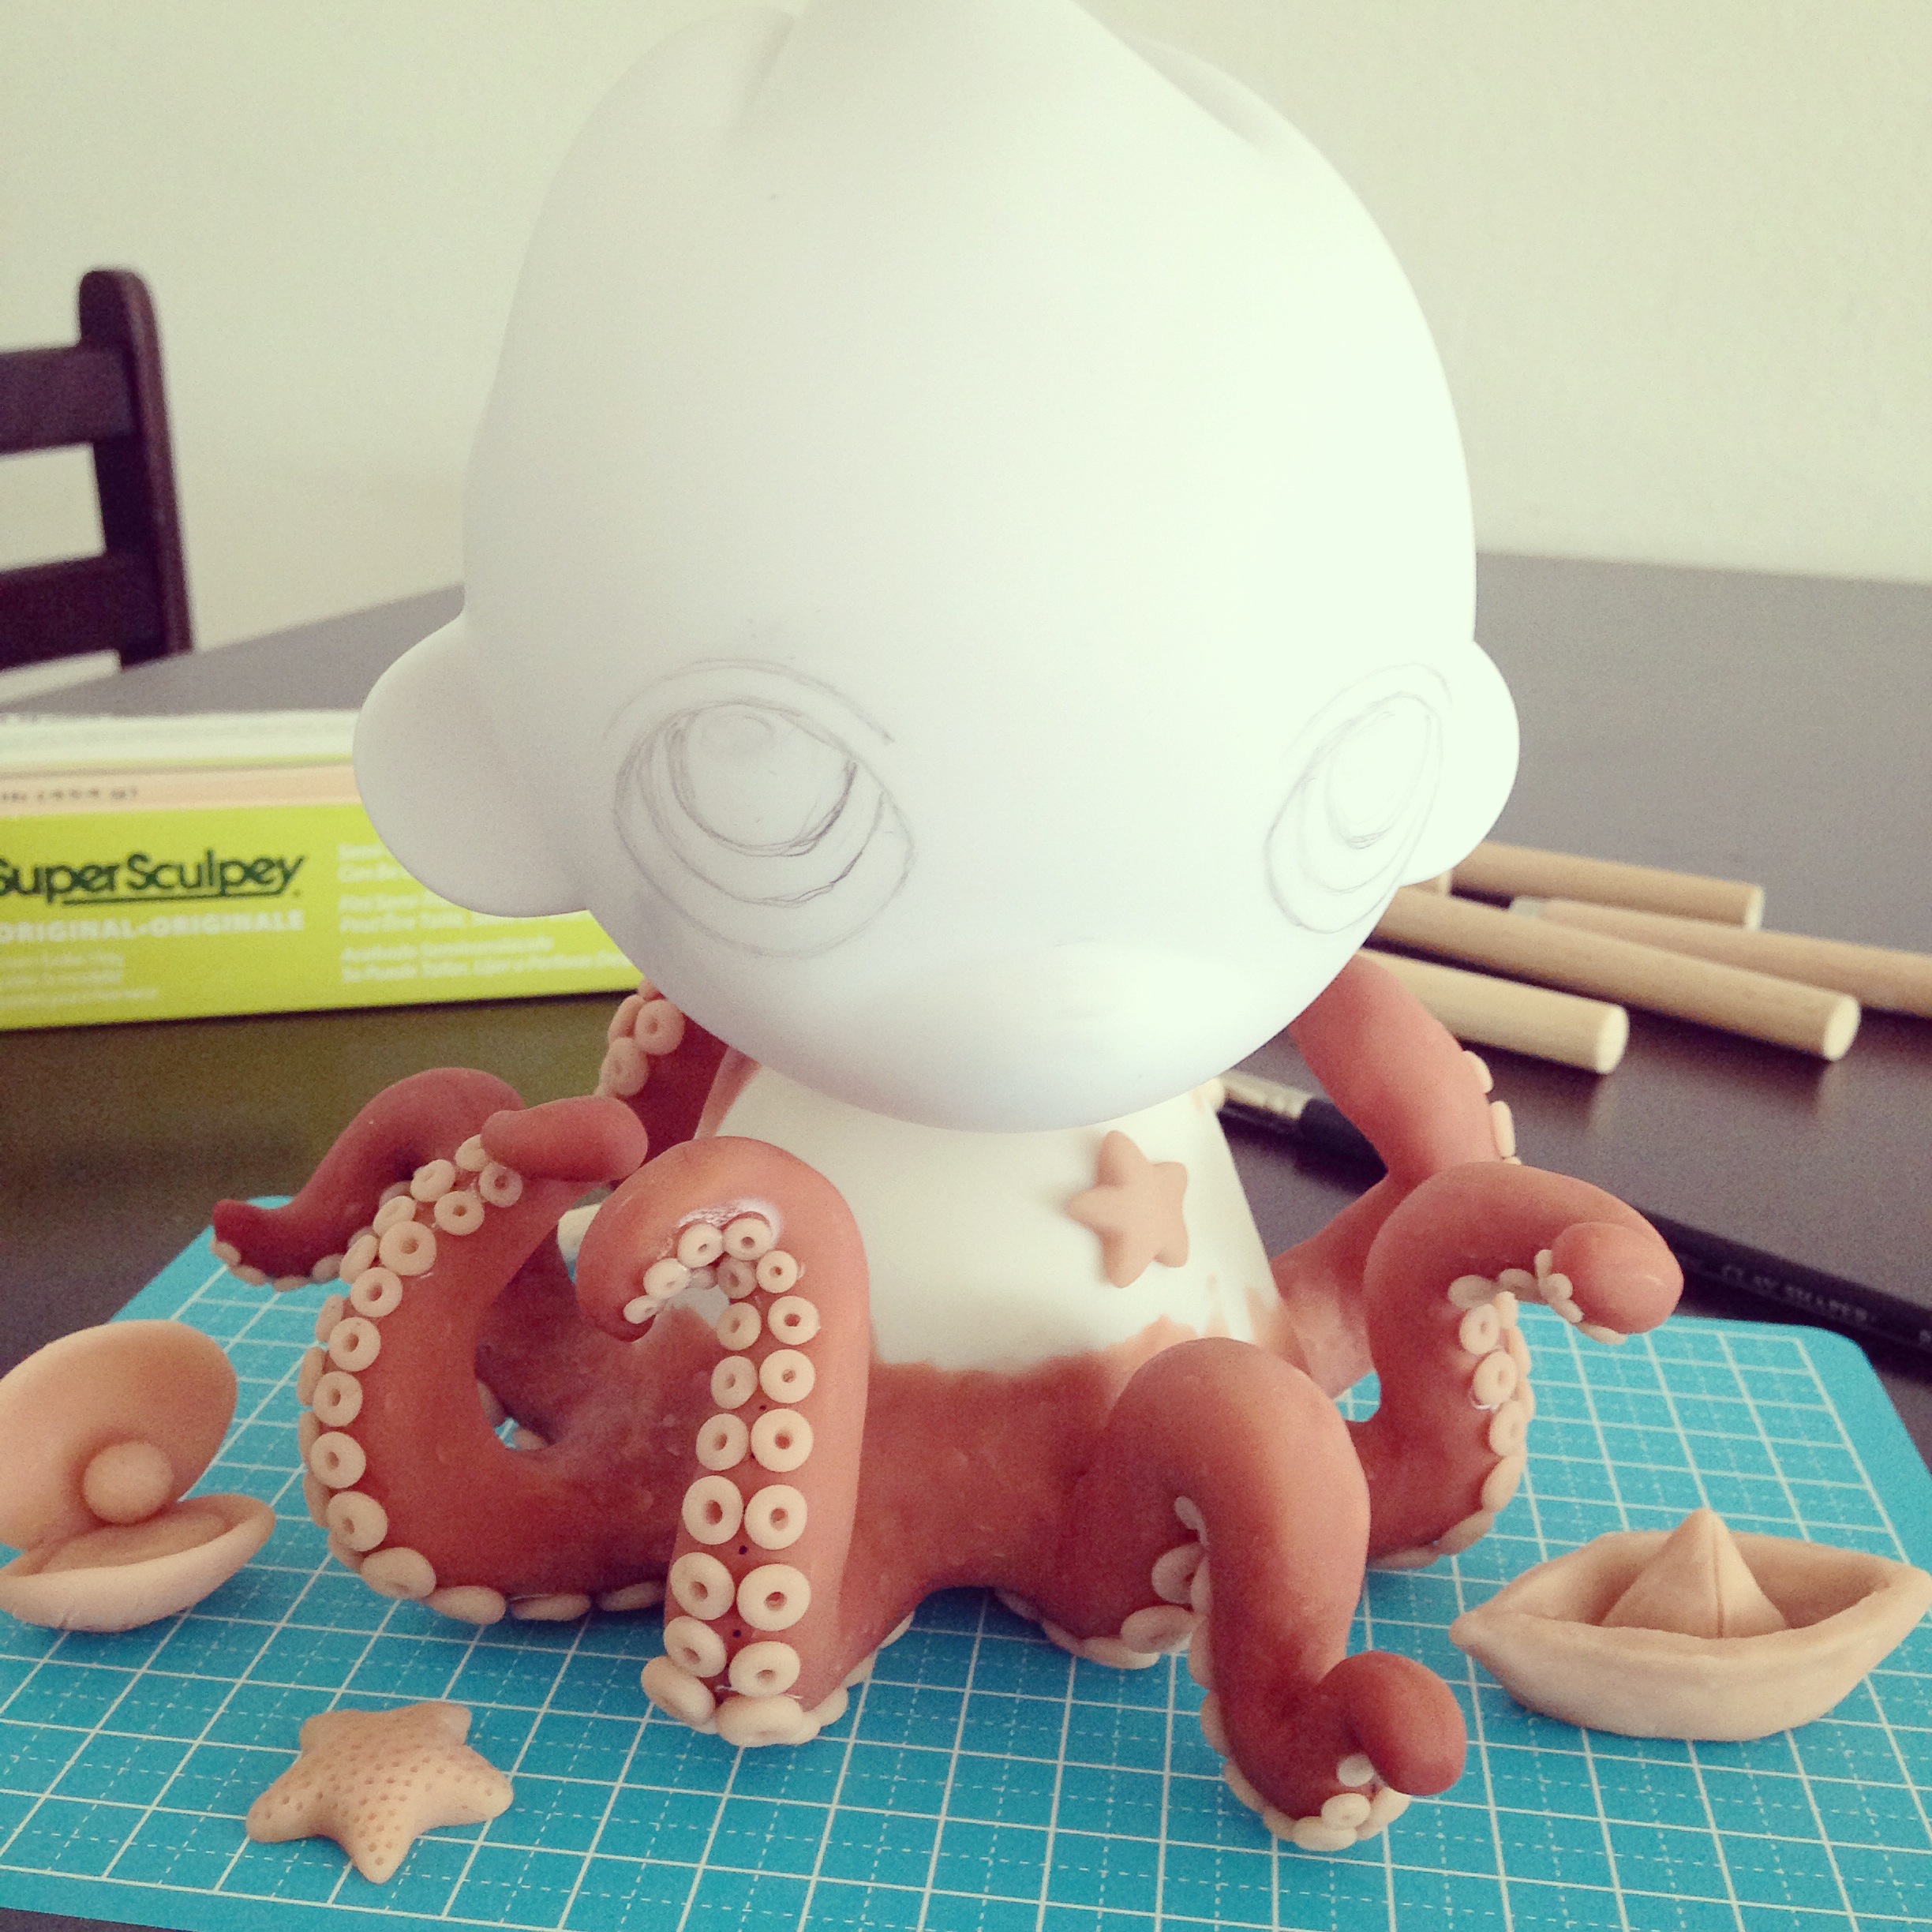
3. Make the tentacles
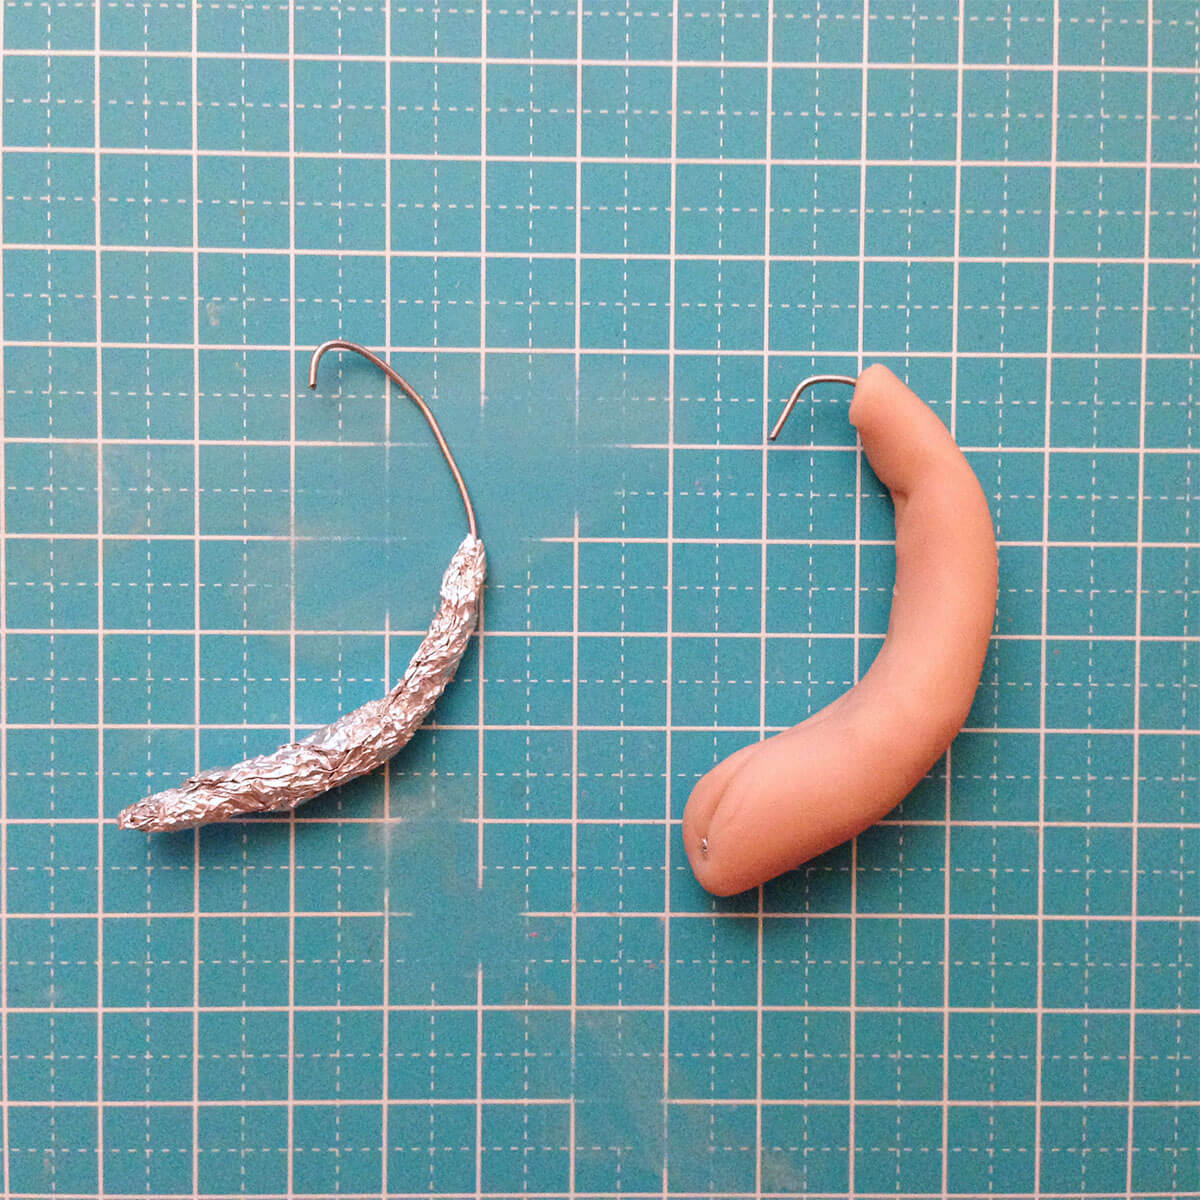
Here is an example of how I used the wire and foil method for my tentacles. I cut a length of wire and shaped it with pliers. Then, I added foil at the base where the tentacle will be thicker. Then wrap the clay around and smooth out the seams.
It’s a good idea to make all of your tentacles before attaching them to your figure. This way, you can check that they are all the same size and will fit comfortably all the way around the body. Before I started attaching, I put all the tentacles in a circle around the body to get a rough idea of how they should be attached. It’s okay if there are gaps in between the tentacles – you will fill these in clay!
4. Attach tentacles to the body
If possible, detach the head of your figure from the body. Vinyl will get soft when heated, and you don’t want it to deform under the weight of the tentacles while in the oven. Attach the tentacles one at a time. Use clay to fill the space between your figure’s legs as well as the gaps between the tentacles. I used a lot of clay for this step. Once you are done, bake the figure according to the package directions upside down so the tentacles are in the air, using aluminum foil as support underneath. I did this because Sculpey gets soft with heat, and I wanted to keep the smooth curves of all my tentacles. If I didn’t bake the body upside down, then the bottoms of all my tentacles would have developed a flat section where they touched the bottom of the pan/baking tray.
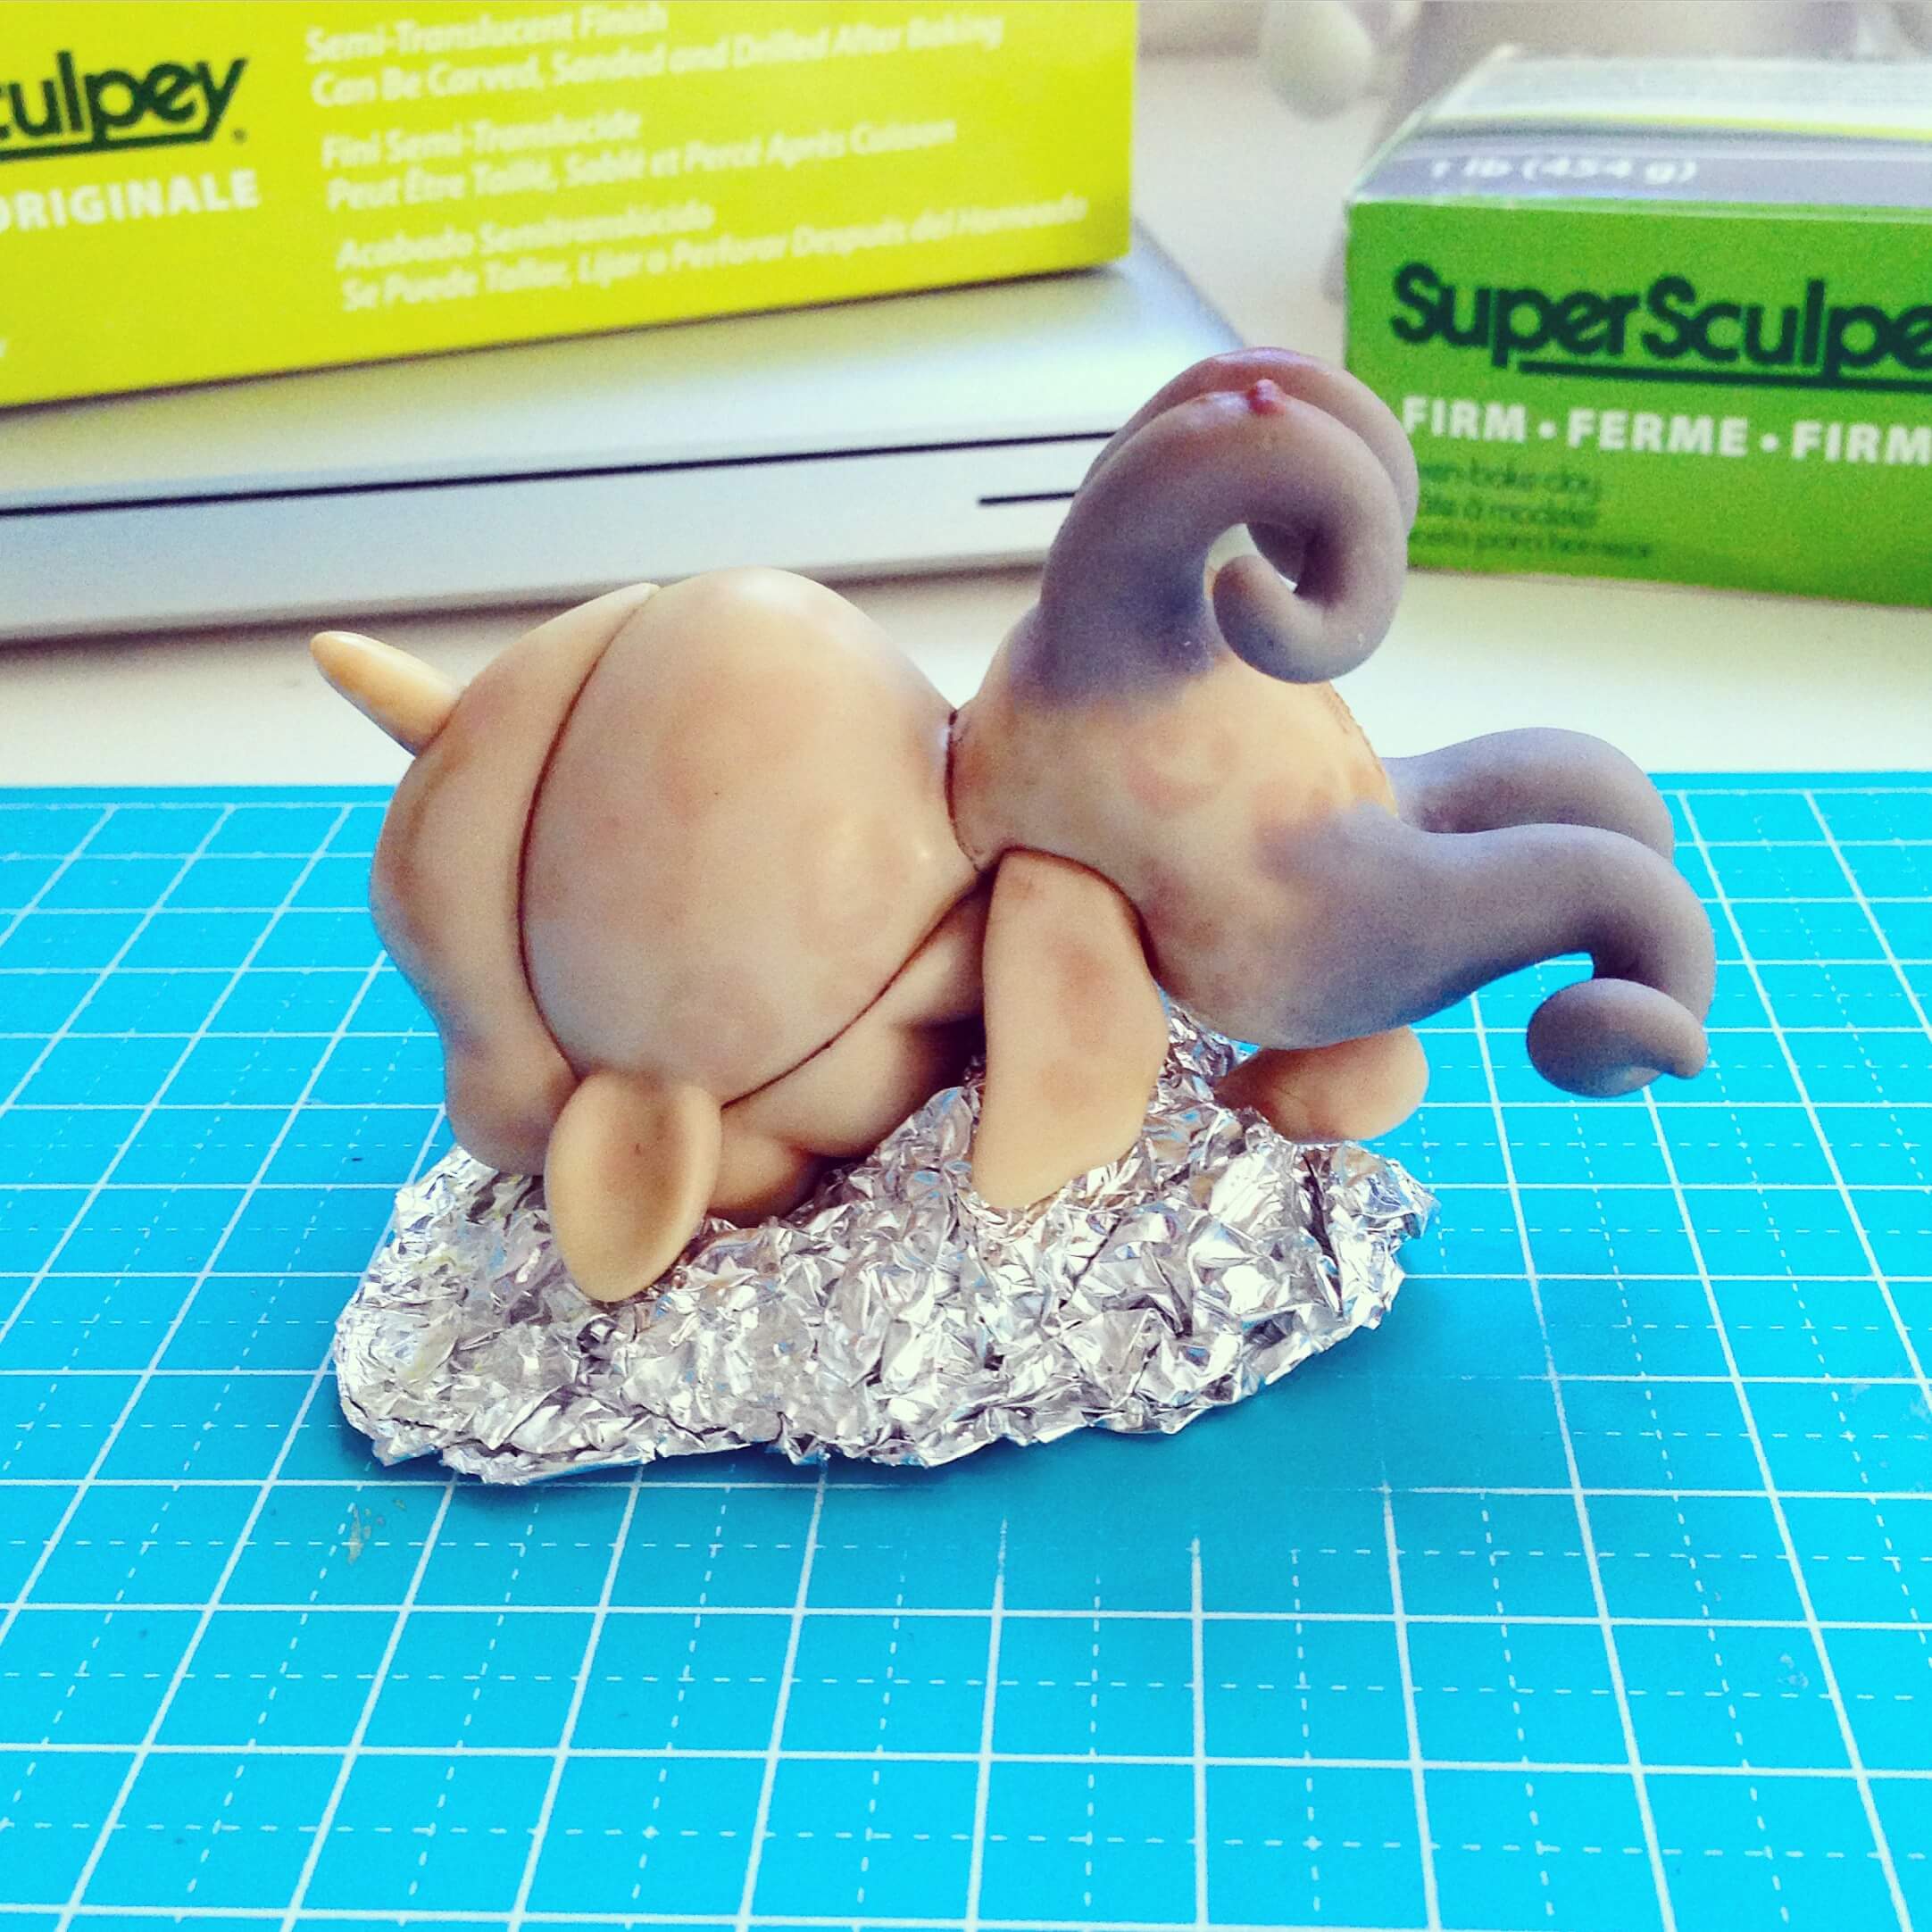
I forgot to take a photo before baking, but here is a pic of another tentacle project I worked on before baking upside down. You can see how I shaped a piece of aluminum foil to hold the body up.
5. Last Step! Make and attach the suckers
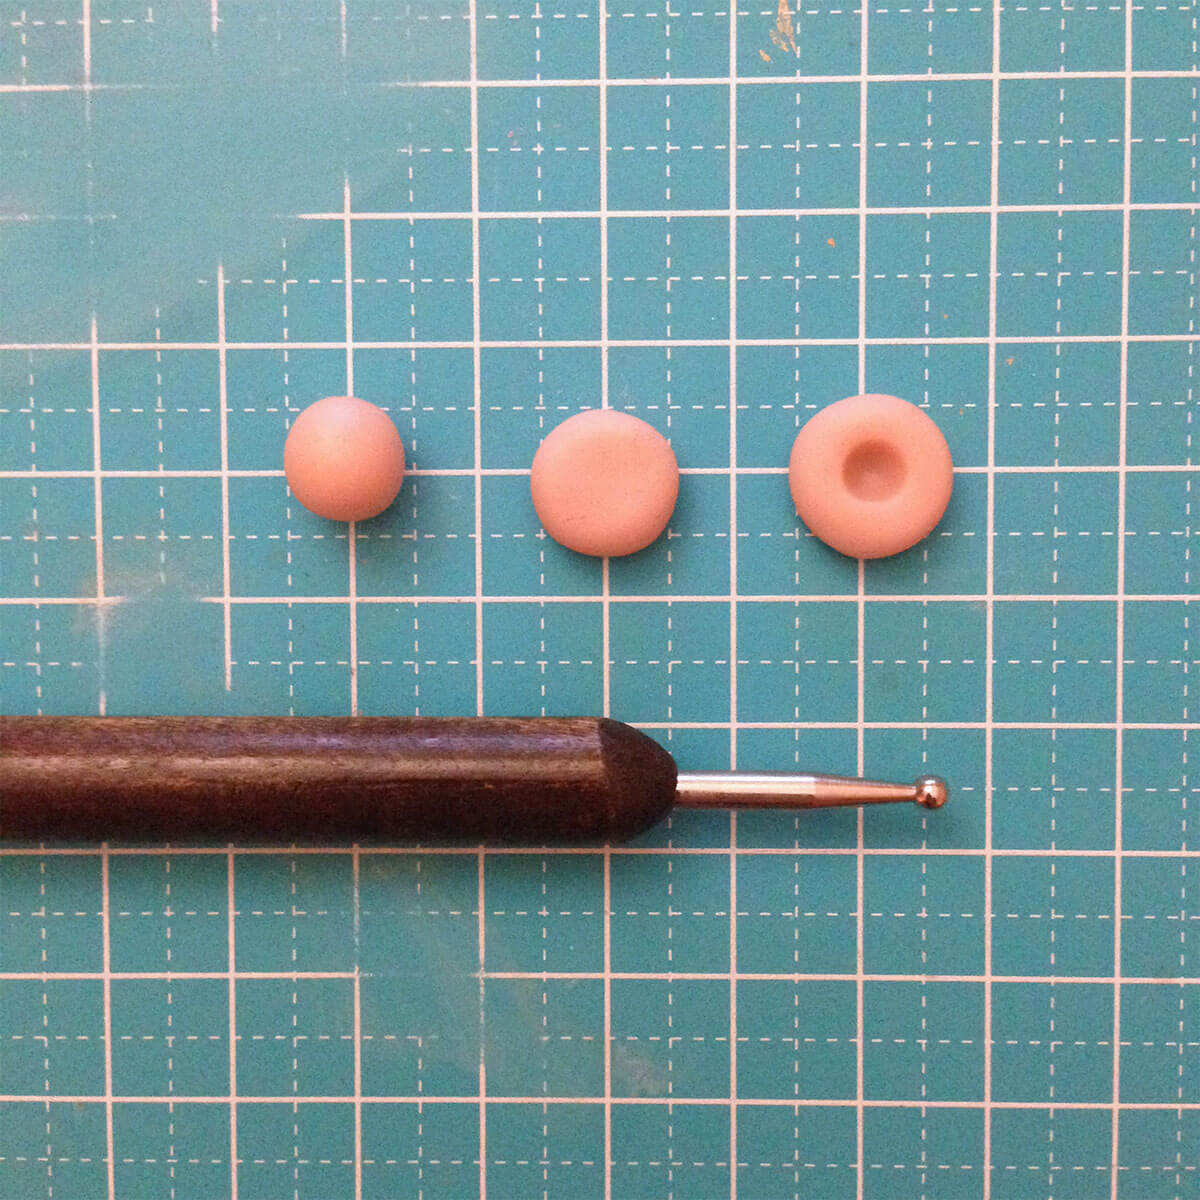
This is the most tedious part of all! Making each of those round suckers and attaching them takes hours, so get a comfy seat. Here’s how to make them:
- Roll a ball of clay
- Flatten it a little
- Use your ball-ended tool or other blunt instrument to make an indentation
I make a bunch of them at once, in various sizes. Then starting at the tips of the tentacles, I attach the smallest suckers with a teeny dot of krazy glue, increasing in size as I work my way towards the body. Once you are finished, get up and stretch! Then bake your figure in the oven (upside down again).
*Safety note – use gloves when using krazy glue because if that stuff touches your skin it will stick like white on rice. It is impossible to get off your skin and makes it extremely dry (basically how it sticks to everything so well is that it sucks out all moisture from whatever it touches).
Voila! Your tentacles are complete! I’ll do another tutorial on picking colors and painting later on. For now I’m still working on the figure for my upcoming Instagram GIVEAWAY (check out @mjhsu for details).