Overview
- Materials
- Remove old paint
- Prime
- Sketch
- Paint
- Seal
Introduction
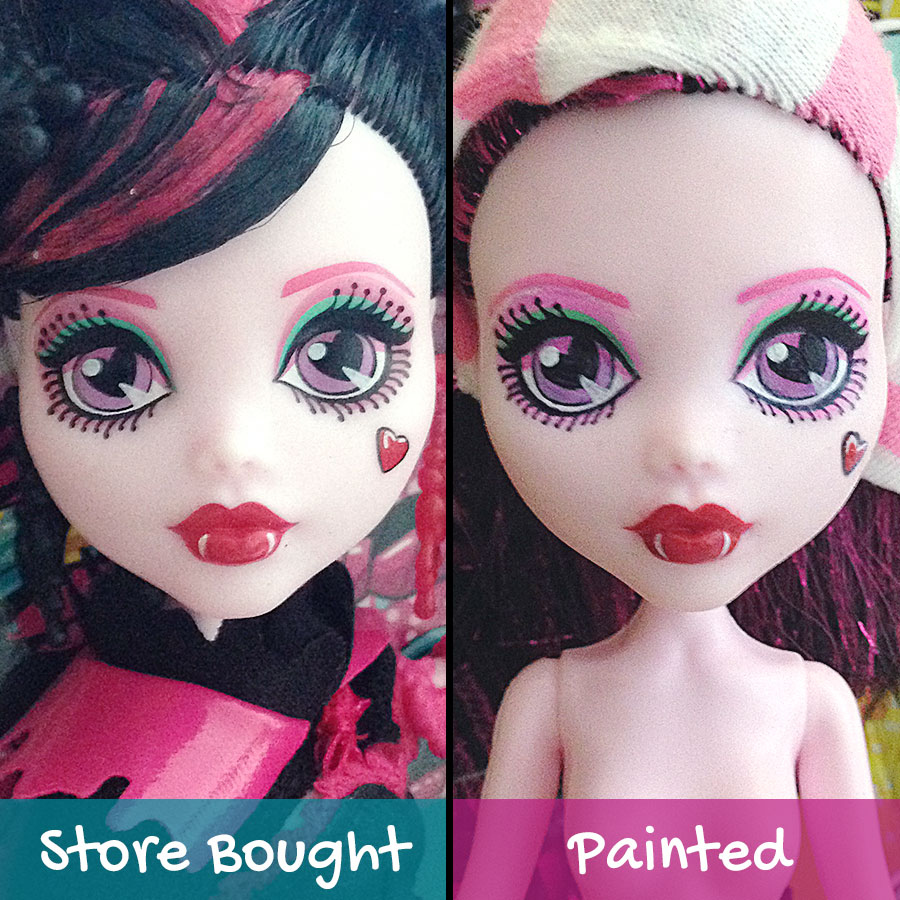
In this tutorial I will be showing you how to repaint a Monster High doll face. I will be using a Draculaura doll and attempting to copy the Sweet Screams face paint.
1. Materials
- Doll
- Acetone
- Cotton balls or q-tips
- Paint primer or Testor’s Dullcote
- Watercolor pencil
- Paint Brushes
- Acrylic paint
- Sealant
Details about materials:
Acetone
If you need to wipe off a doll’s old face paint, use 100% acetone (aka nail polish remover). Make sure the nail polish remover is 100% acetone or else you won’t be able to remove the paint no matter how hard you scrub! I made that mistake once and it wasn’t pretty.
Paint primer or Testor’s Dullcote
You will need to seal and prime the doll’s face before painting so that the acrylic can stick onto the surface. For this project I used Liquitex Clear Acrylic Gesso, which is a brush-on primer. I have a big bottle of it so I use it for everything. However, it has a gritty texture when it dries. The texture is great for helping paint stick to whatever surface you’re painting on, but if you want something that’s more smooth to the touch, you should use Testor’s Dullcote. It comes in a spray can and actually doubles as a sealant! It doesn’t have as much tooth as gesso, but the smoother surface might be more suitable for doll faces.
Watercolor Pencils
Watercolor pencils can be found at any art store. I use these to sketch on my toys and dolls before painting. DO NOT use a regular graphite pencil or colored pencil because they are impossible to erase if you mess up – it will only leave a black smear. With a watercolor pencil, you can easily wipe it away with water if you need to change your sketch.
Some people can actually do an entire face almost entirely with watercolor pencil. Doing it that way results in a much softer look. I wanted bold lines and colors, so I chose to stick with acrylic paint.
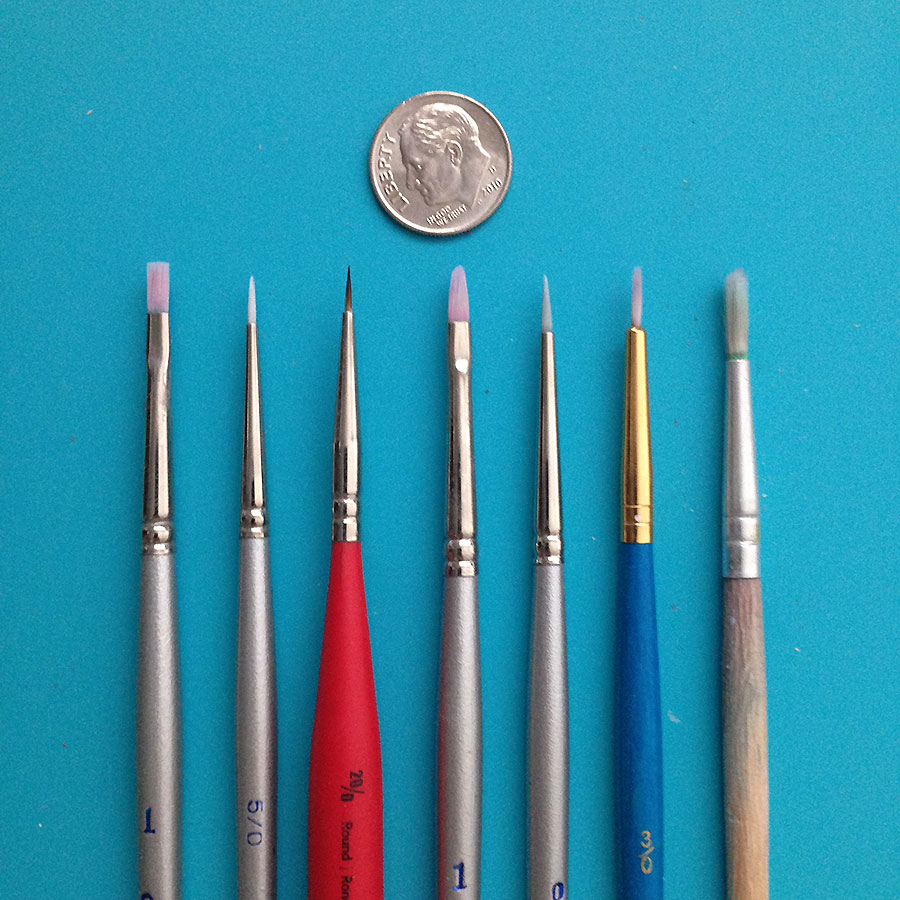
Paint Brushes
If you’re going to be doing a lot of painting projects, it’s a good idea to invest in some good paint brushes. The cheap kind get misshapen, lose their point, or shed hairs easily. That said, I do have a pack of cheap-o brushes that I use for stuff like applying glitter/glue, building texture, or anything that doesn’t require a fine point. Here’s a photo of the brushes I used for this project:
Sealant
You will need a sealant to protect your paint once you’re done. Testor’s dullcote is the best paint sealer for dolls because it goes on evenly and dries very matte. For a glossy finish (usually for eyes/lips) I use a Liquitex acrylic varnish.
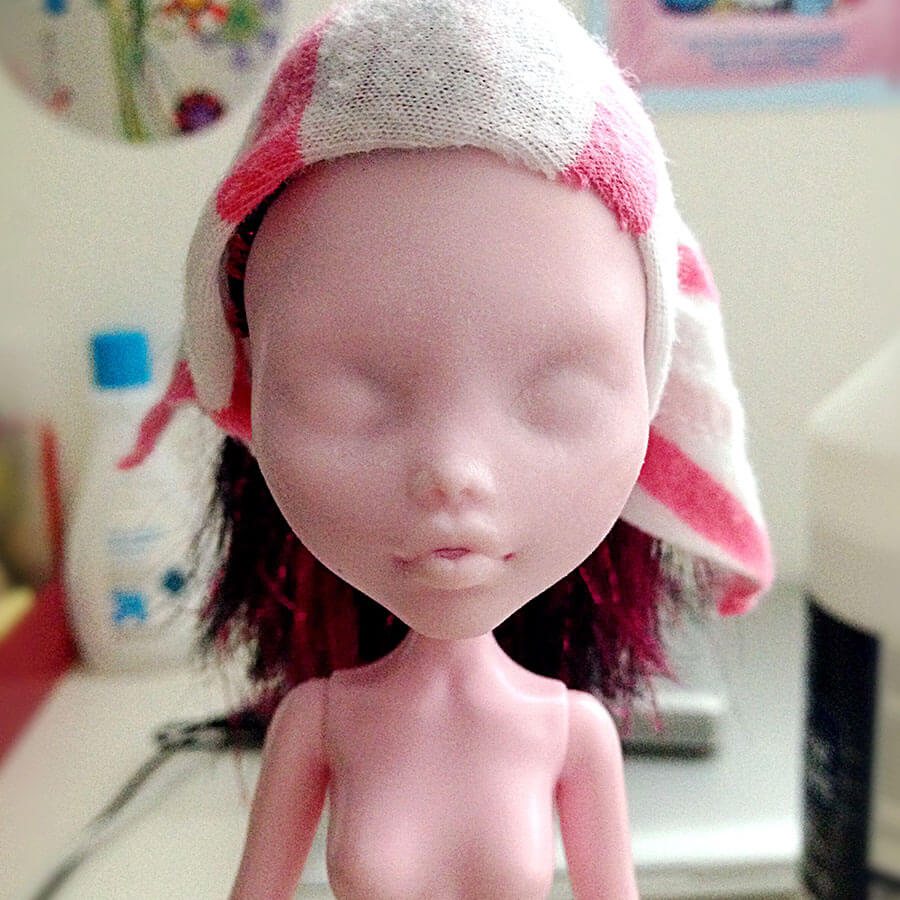
2. Remove old paint
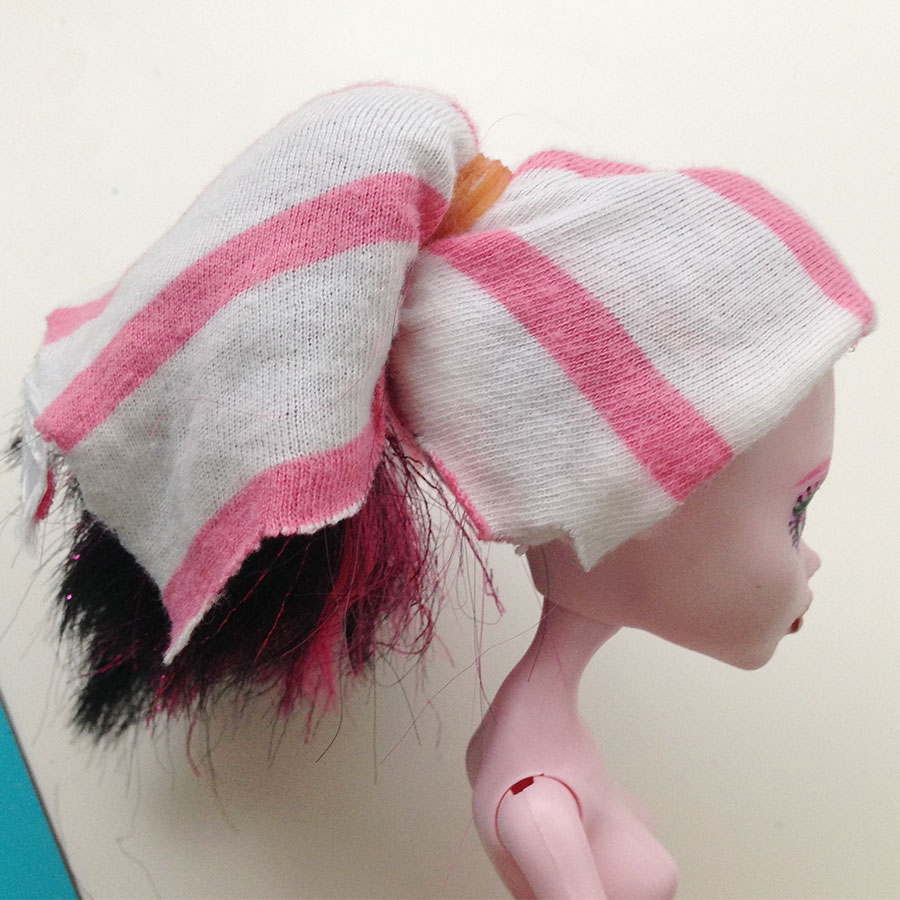
If your doll has hair, it’s a good idea to tie the hair back and cover it so that you don’t get any paint in it. My Draculaura doll already had a ponytail, so wrapped an old rag around her head and secured it with a ponytail. If you don’t have a rag, you can use plastic wrap.
Next, use a cotton ball or q-tip dipped in acetone to gently wipe off the old face paint. Be careful not to let any acetone drip onto the body because it will melt the plastic. If you accidentally let some acetone touch the doll body, rinse immediately with water to prevent damage. Rinse your doll with water once you are done removing all the paint.
3. Prime
Using a paint primer allows paint to stick onto your doll’s face. For this project, I brushed on two thin coats of clear acrylic gesso over the eyes and mouth area. Wait for it to fully dry before going to the next step, which could be 15-20 mins depending on the temperature.
If you are using Testor’s Dullcote, cover the doll body with a rag or plastic wrap and then spray the face.
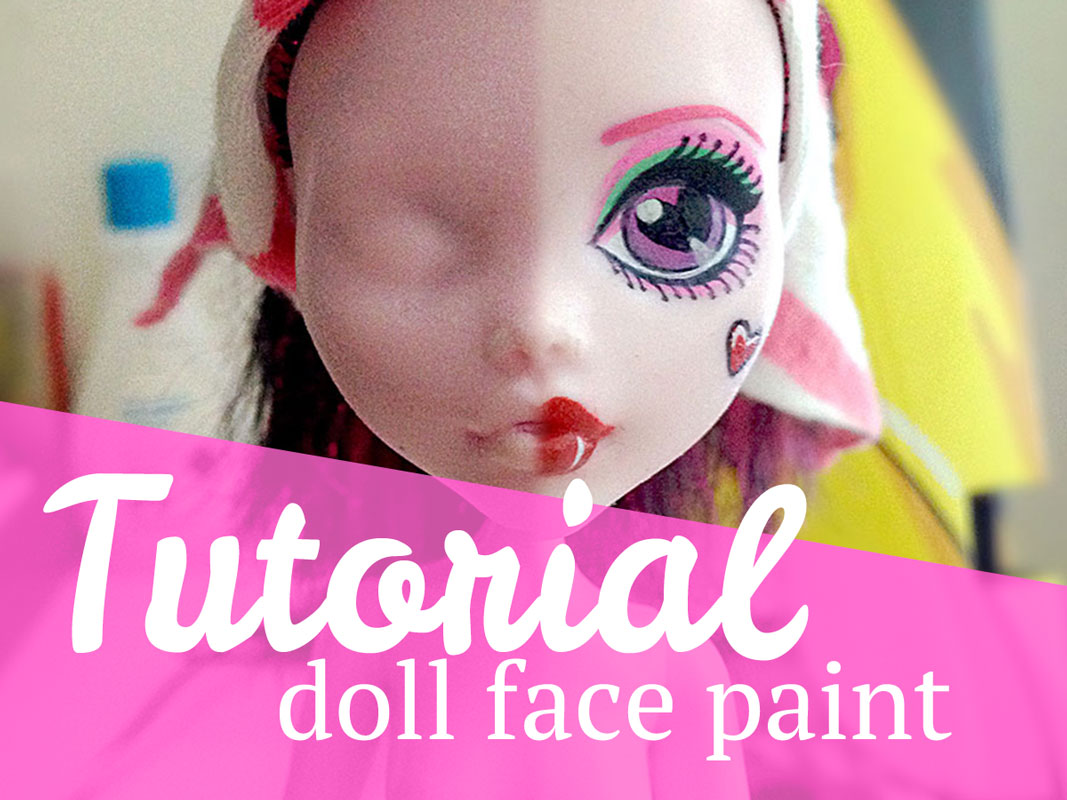
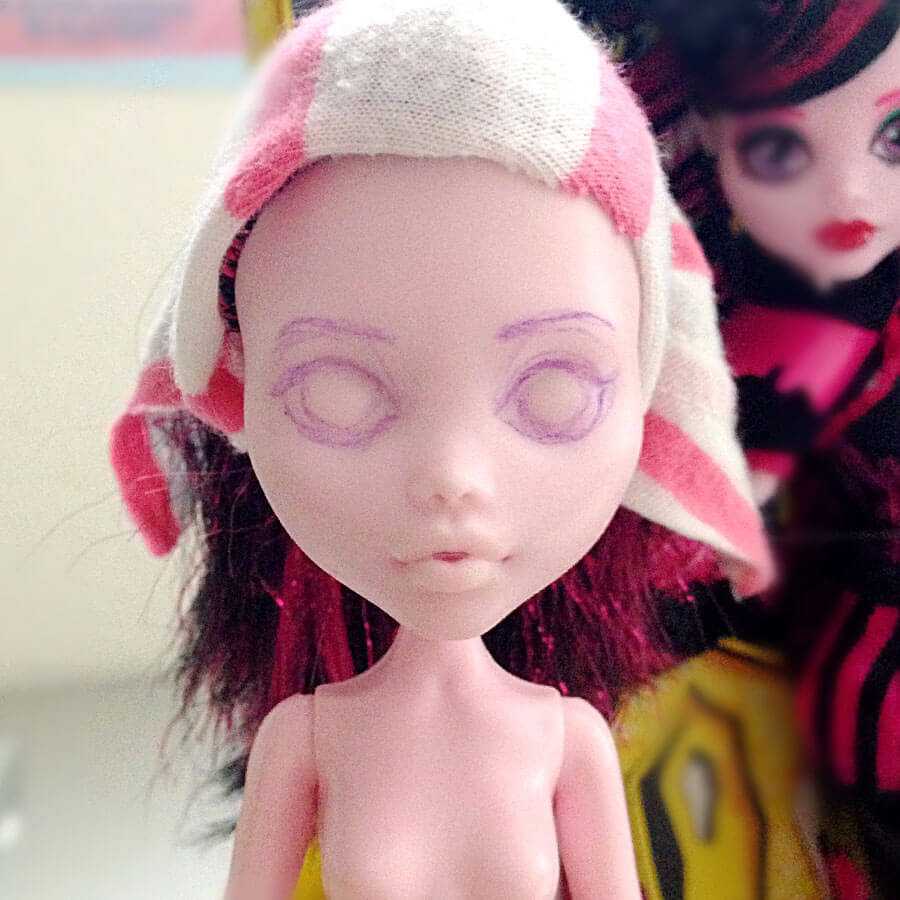
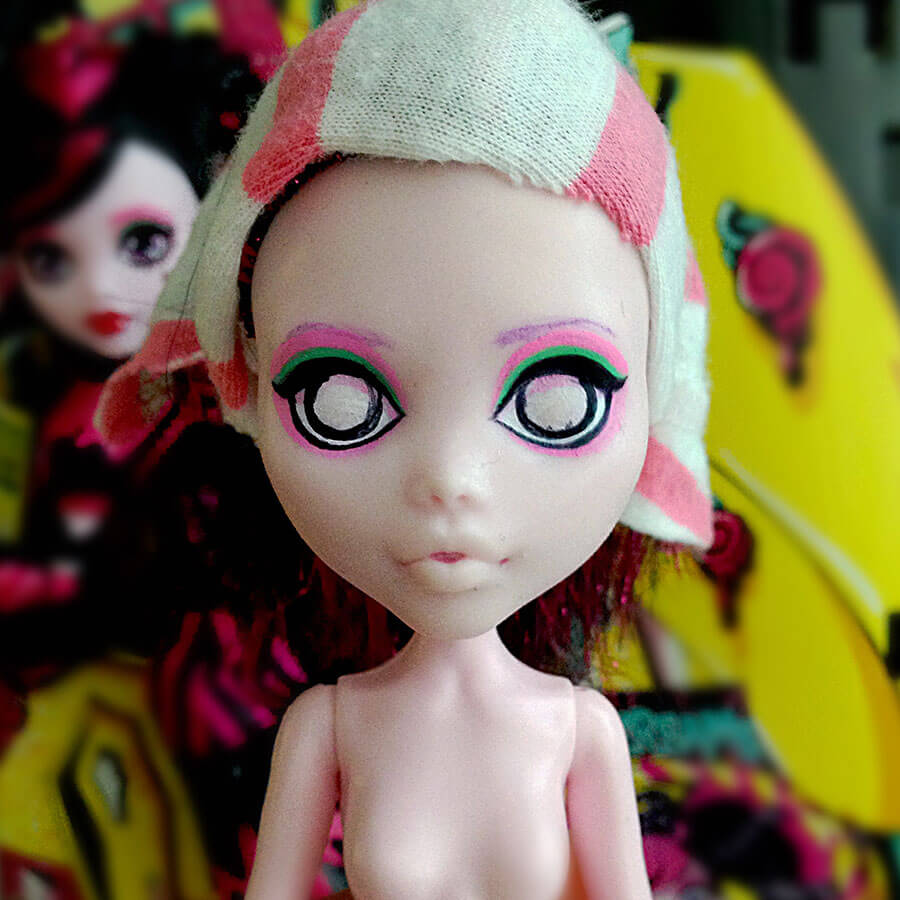
4. Sketch
Pick a watercolor pencil to use for your face sketch. I chose purple because it will blend well with the colors I plan to use. I never use black because it always shows up too strong when I go over the lines with paint.
Very lightly sketch out the basic shape of the eyes and eyebrows. I also outlined where the edge of the eyeshadow will be. It’s okay if it’s a little messy – you’re going to paint over it anyways. If you need to erase, use a wet paintbrush to wipe off the lines.
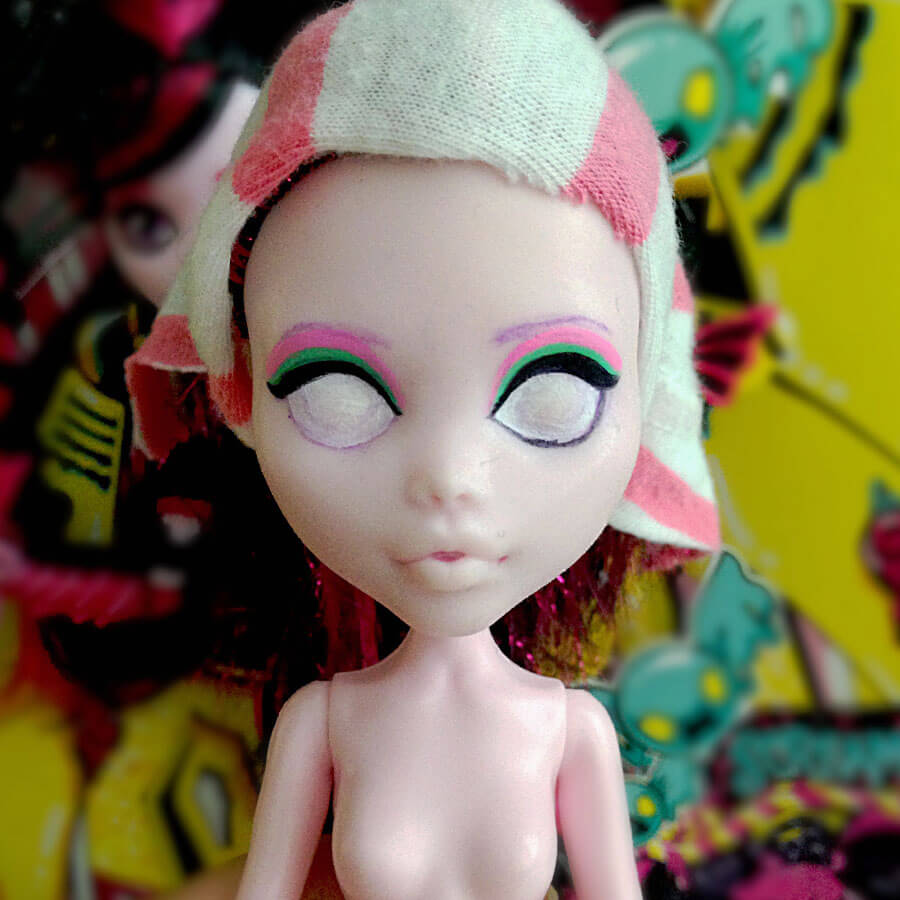
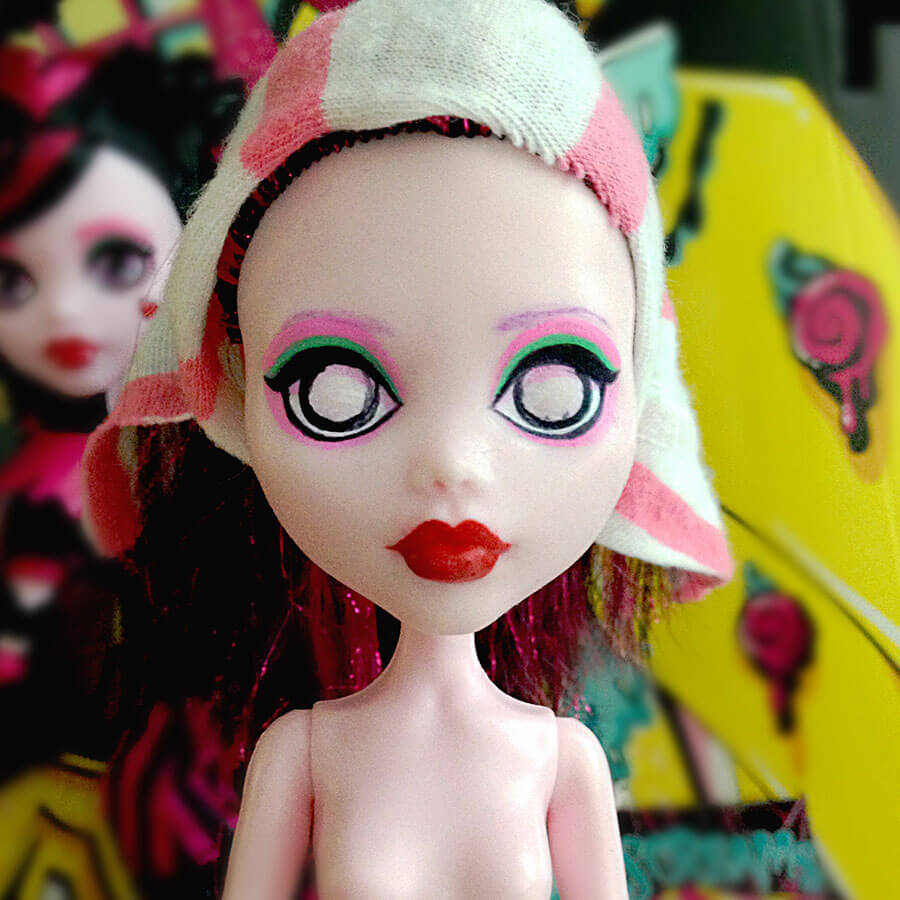
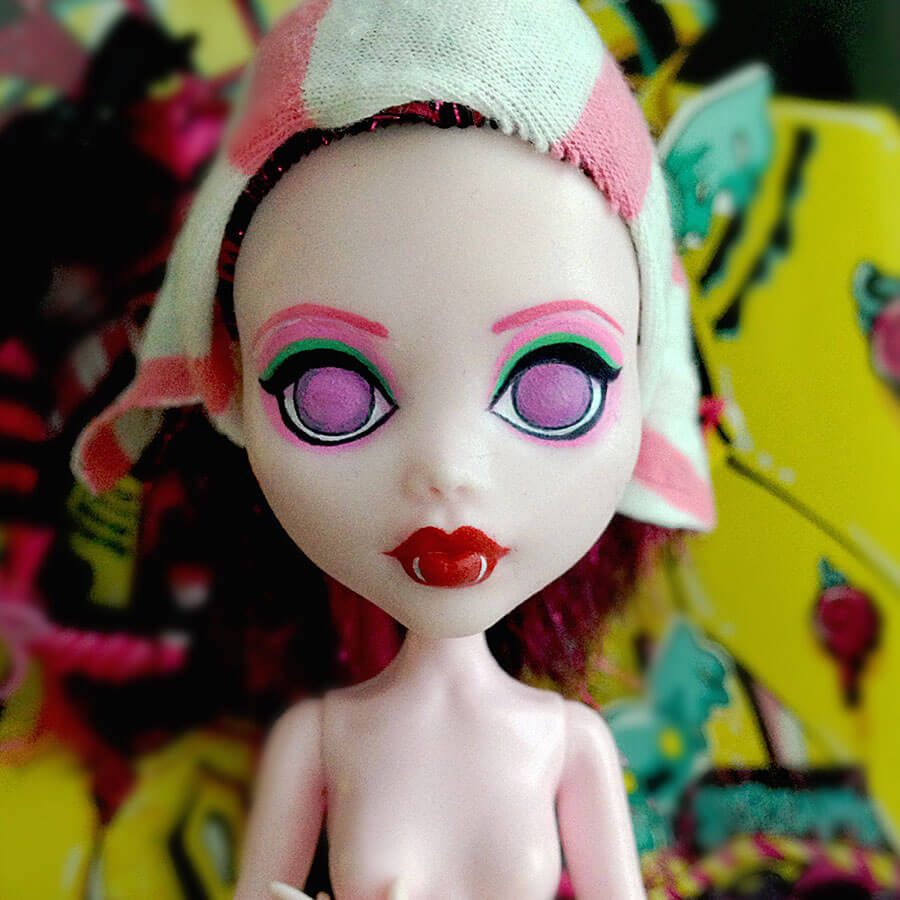
5. Paint
Start your face paint by filling in a thin layer of white for the eyeballs. You want to still be able to see your lines a little bit. Then paint the eyeliner, eyebrows, eyeshadow, and lips. Work in thin layers to keep the paint from clumping up.
The eyelashes and irises are the hardest, so I save those for last.
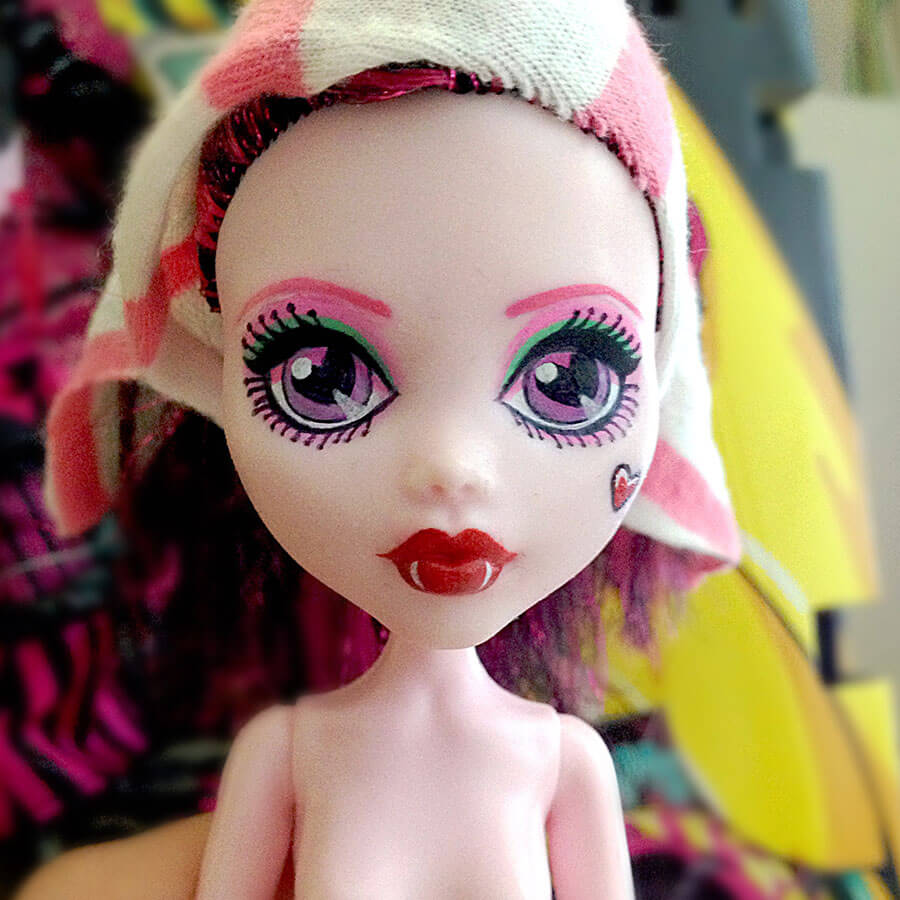
4. Seal
When you’re done painting, seal it up with another coat of Dullcote or other sealant. You can paint some acrylic gloss medium or varnish over the eyes and/or lips to make them a little shiny.
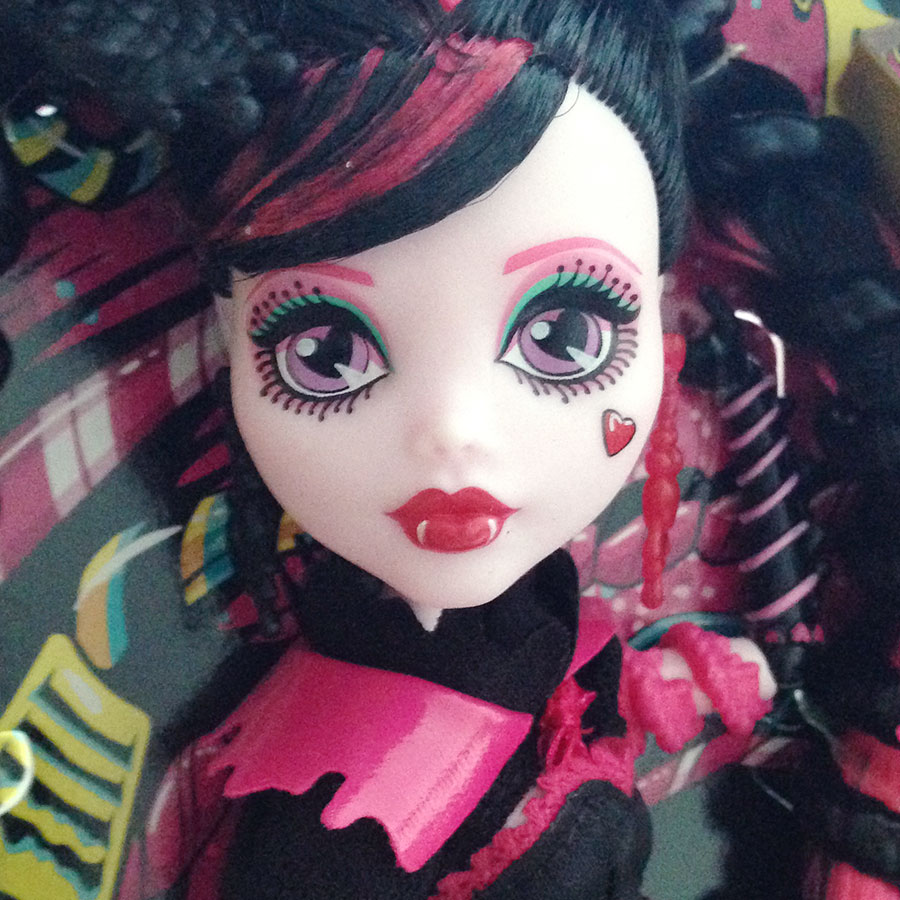
Now you’re all done! Here are a couple of comparison shots. How do you think I did? Let me know on Instagram or Twitter.