Overview
- Materials
- Prep and Plan
- Make Mold Box
- Plant Figure
- First Pour
- Second Pour
- Demold
Making a mold out of your clay sculptures is the first step in creating resin-cast copies of your work. It takes a lot of time and patience to get it right, but in the end you will be able to make many perfect copies of your figure!
In this tutorial I will show you how to make a silicone mold of my two-headed custom Unicorno figure. The total process takes many hours (about 17), divided over the course of two days. Don’t let this discourage you! Half of the time you are just waiting for the silicone to cure (solidify). I will give you some tips to help this process go more smoothly.
Related tutorials:
If you have any questions after reading through the tutorial, feel free to contact me:
Email: hello@mjhsu.com
Instagram: @mjhsu
Twitter: @mjhsu_art
1. Materials
- Your sculpture or figure
- Smooth-On Silicone
- Disposable Paper Cups
- Disposable sticks
- Cardboard or other rigid material
- Glue Gun
- Mold Release
- Sulfur-Free Clay
- Tin Foil
- Clay tools for smoothing
- Latex-Free gloves
- Newspaper box (to contain your mess)
I have listed some of these materials in my Amazon AStore if you need to purchase of of the supplies.
Details about materials:
Your sculpture or figure
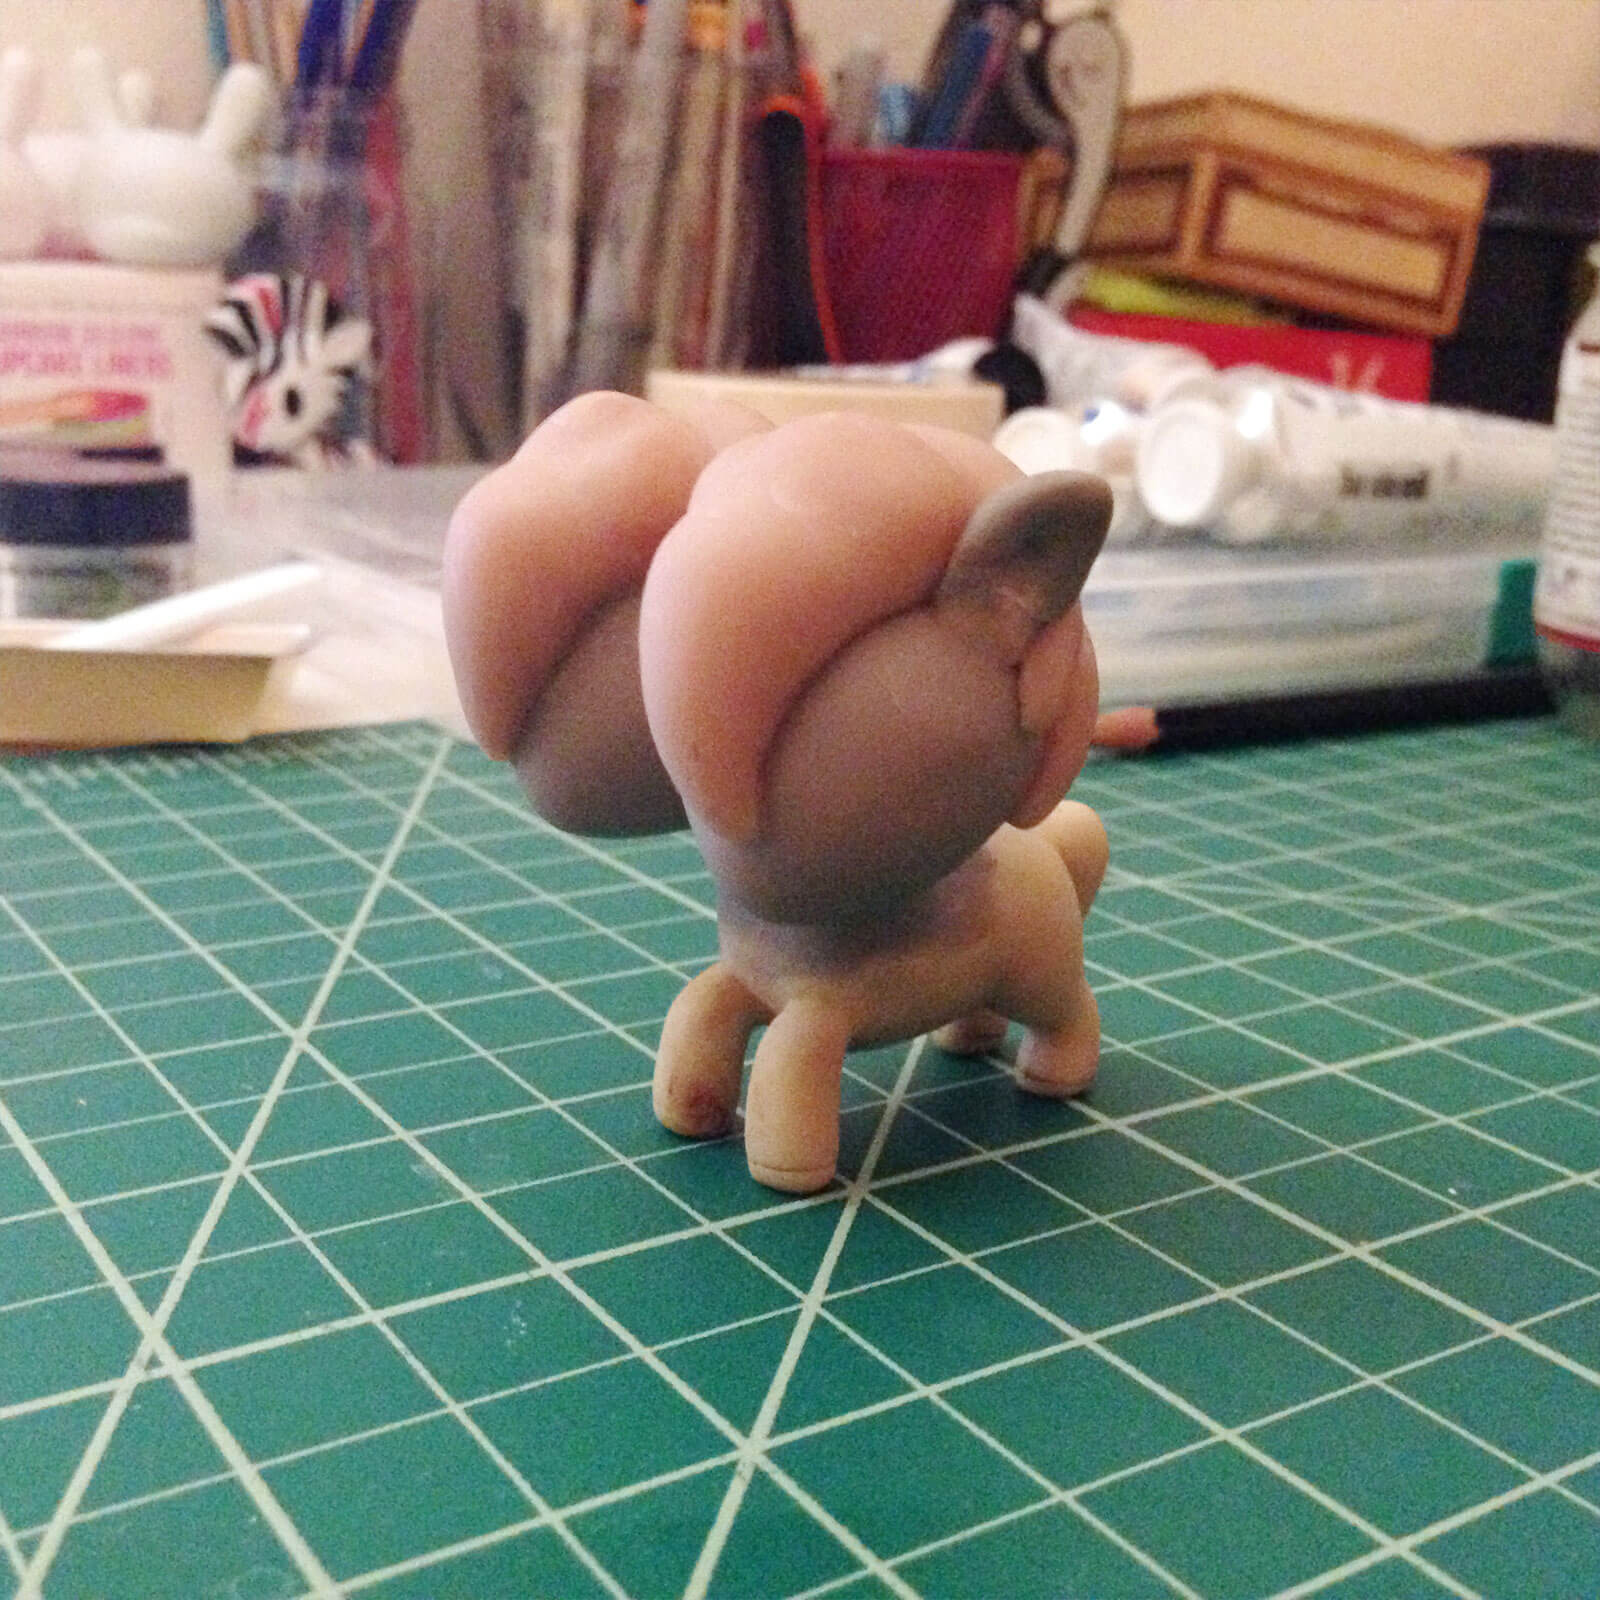
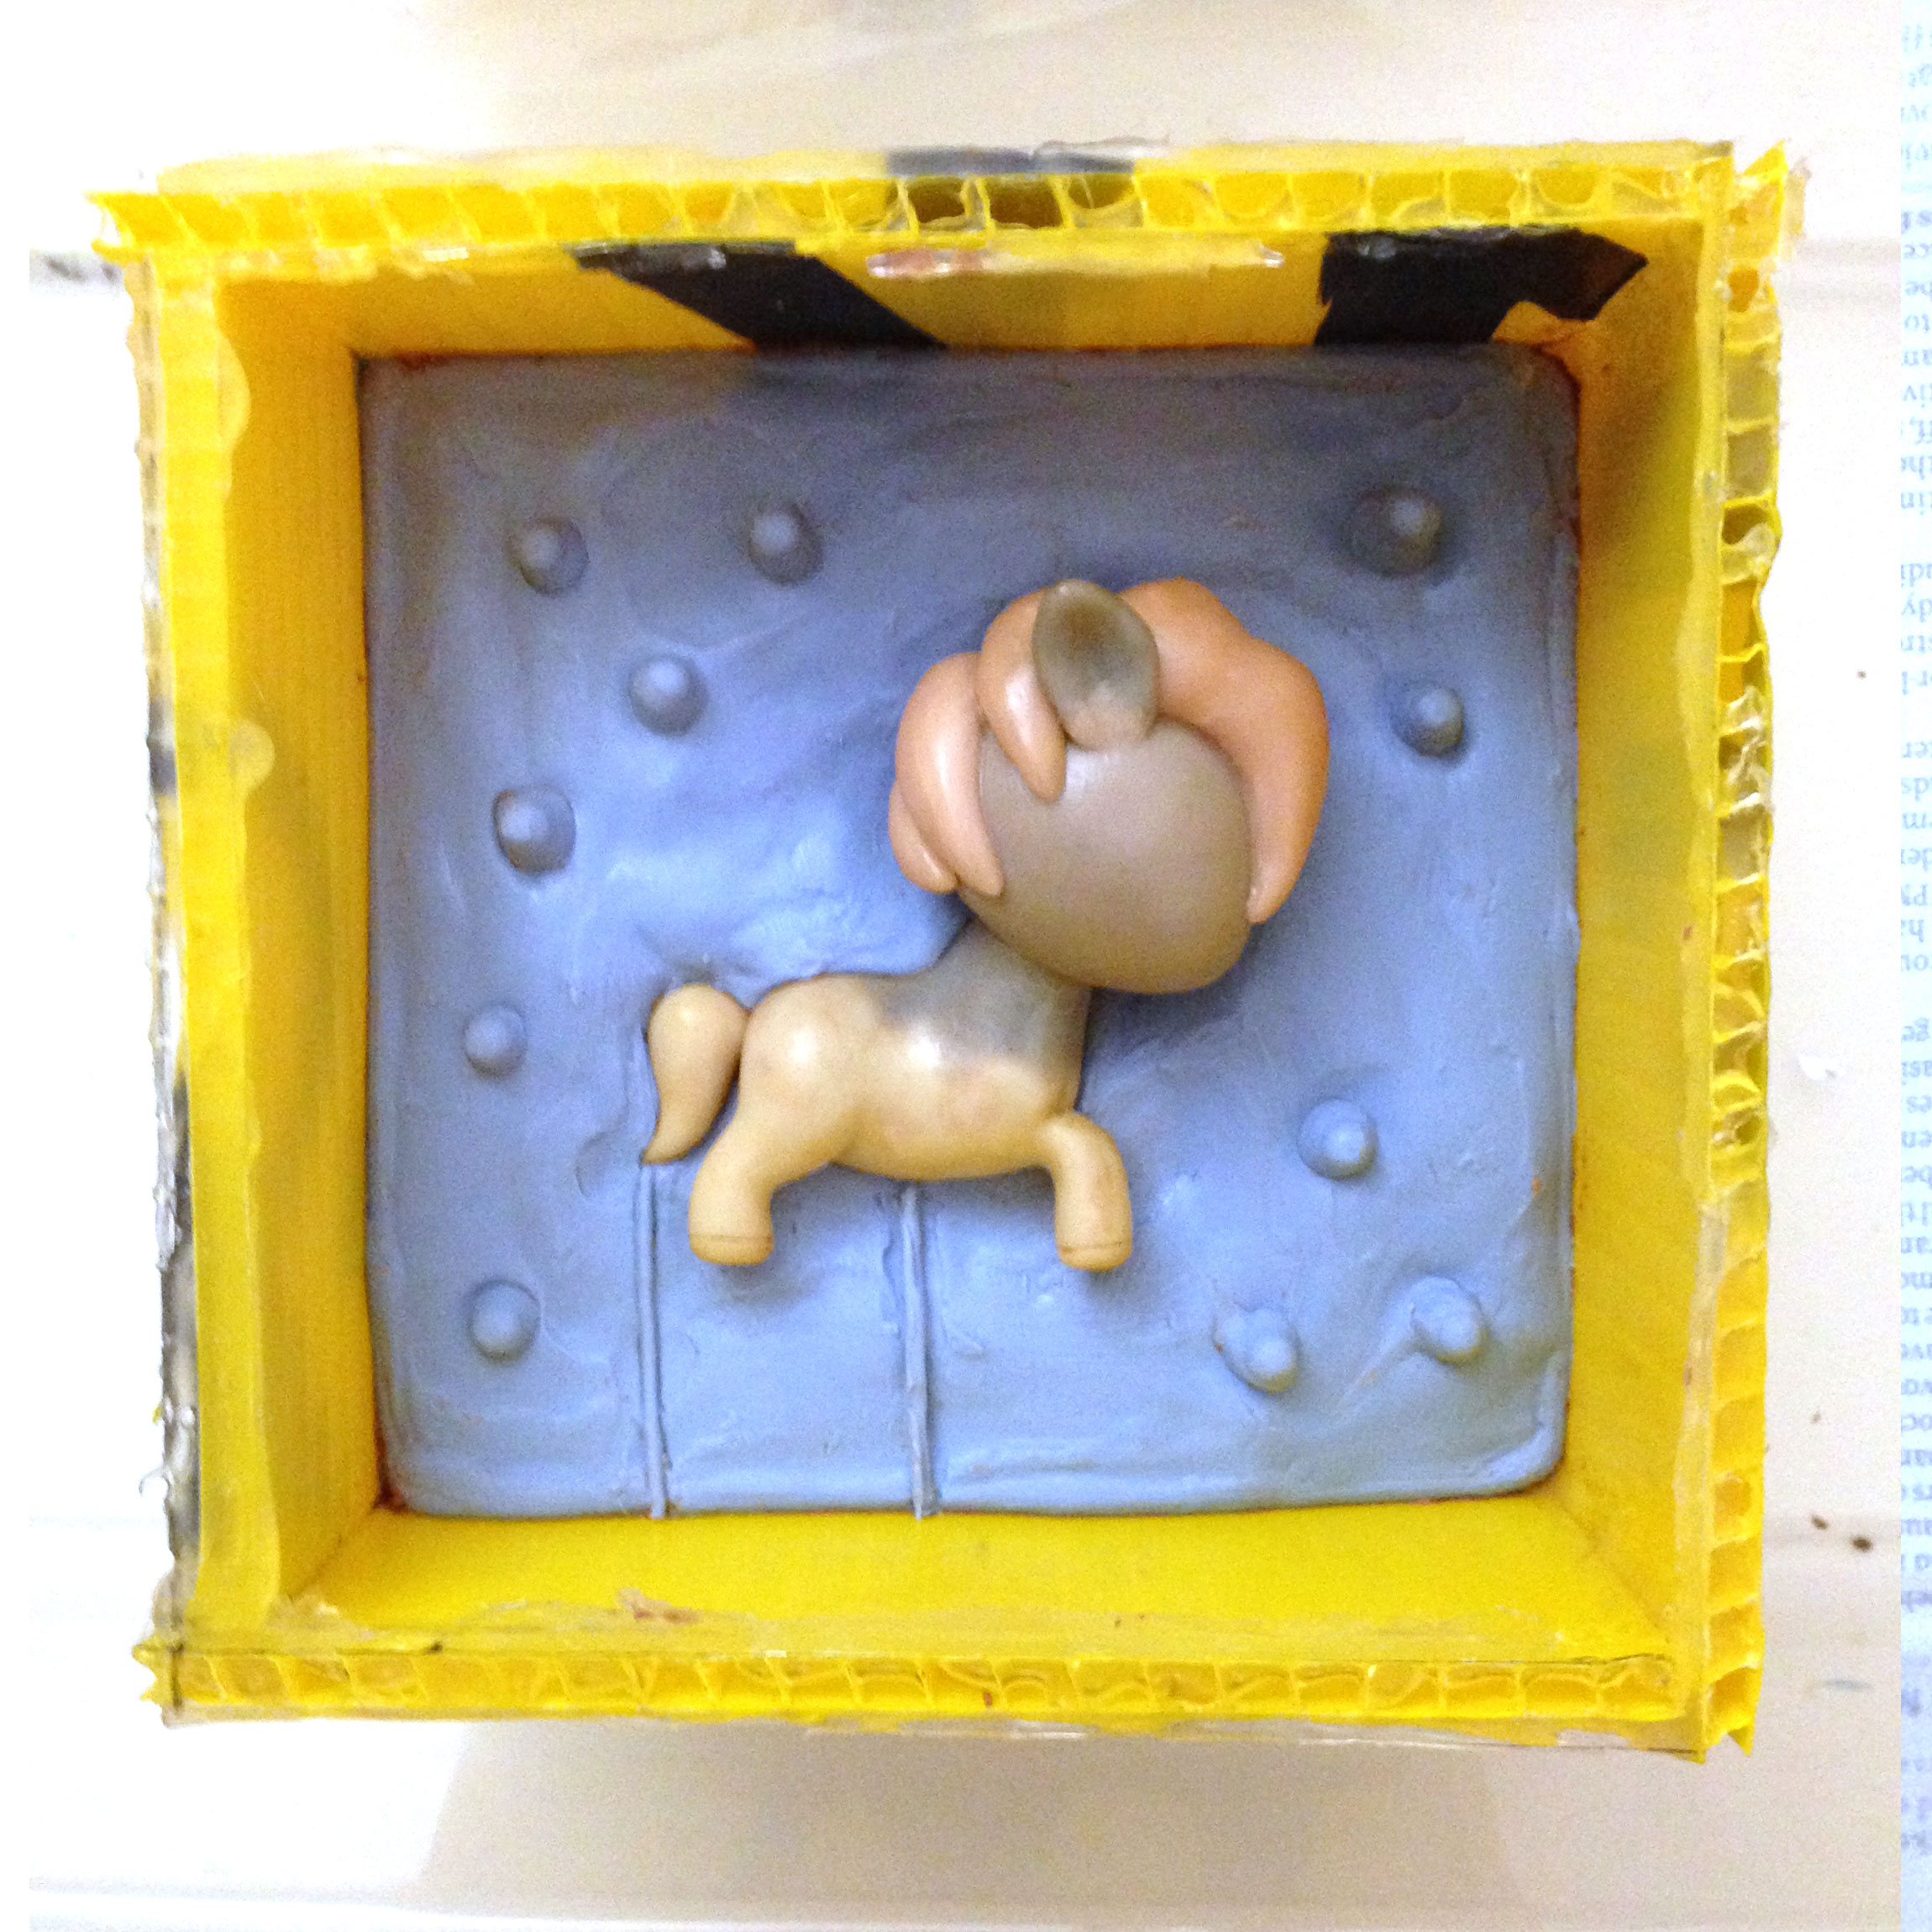
For this tutorial, I will be using my two-headed Unicorno.
Smooth-On Silicone
Smooth-On offers a variety of products for mold-making and resin casting. From my own research online, it seems to be the brand that everyone uses. If you do a Google search for “How To Make a Silicone Mold”, you will probably find that Smooth-On’s Oomoo-30 is the most commonly used and widely available. Oomoo is good for molding simple objects that don’t have delicate appendages sticking off of it. However, it is not suitable for figures like my tentacled Aquacorn, which has thin tentacles that may tear the mold, or even break off.
A better alternative, and the silicone that I use exclusively now, is Smooth-On’s Moldstar-15. A rep at Reynolds Advanced Materials explained that MoldStar is more flexible than Oomoo, which is better for sculptures with delicate parts like my tentacled Aquacorn. MoldStar also doesn’t pinch off or rip as easily as Oomoo. This isn’t an issue if your figure is fairly simple, but a sculpt with a bunch of arms and legs sticking out of it might rip an Oomoo mold when you try to remove it.
The first image below (purple) is Oomoo-30 and the second (green) is MoldStar-15. As you can see, the figure I used with MoldStar has more delicate legs, which would break off or rip an Oomoo mold.
It’s obvious that I’m completely sold on MoldStar silicone. But if it’s not a huge deal if Oomoo is the only thing available to you. The process for using both are exactly the same, except Moldstar only take 4 hours to cure (solidify) instead of Oomoo’s 6 hours. This brings me to my next point:
Cure time is another thing to consider when choosing silicone. Mixing a pouring silicone will inevitably introduce bubbles into the mold. Bubbles in your silicone cause imperfections on the surface of any objects you cast. So instead of a smooth surface on your cast, you will get tiny little bumps. Slower-curing silicones result in less bubbles because there is more time for the bubbles to rise to the surface and pop. There are varieties of silicone that will cure in an hour or less, but I wouldn’t trust those unless you are using a pressure chamber. Then again, I haven’t tried the fast-cure silicones before – this is just from what I have heard.
If you can, try to purchase your Smooth-On silicone from a local supplier. I get mine from Reynolds Advanced Materials. Silicone has a shelf life (stated in the packaging), after which it will get too thick to pour properly. Local suppliers will have fresher batches, while online sellers may give you old stuff. I bought my first Oomoo kit from Amazon, and it must have been an old batch because it turned way too thick to pour within a month.
Disposable Paper Cups
I use generic disposable paper cups for measuring and mixing my silicone and resin. Don’t use plastic or styrofoam cups from the grocery store because your resin may react with it (I will talk about this more in my resin-casting tutorial). Professional supply shops like Reynolds do sell clear plastic cups with volume measurements marked on the side. Their cups are made of an inert plastic that will not react with resin.
Disposable Sticks
Paint mixers or Jumbo-size popsicle sticks work great. Silicone is very thick and gooey, so the regular-sized popsicle sticks are too short and weak to properly mix it.
Cardboard or other rigid material
You will use this to make your mold box. The material I use in this tutorial is actually an old plastic sign. Plastic or coated cardboard actually works better than plain cardboard because it is easier to separate from the silicone, so you can reuse it.
I have seen people use lego pieces to build a reusable mold box. This method seems to work pretty well, but I have never found a need for legos (yet) because I always have old cardboard boxes lying around.
Mold Release
Silicone will adhere to itself and also to porous surfaces like wood and clay. You will need a mold release agent to keep your figure from getting stuck in the silicone, and to separate the two halves of your mold. It also prolongs the life of your mold if you use it before casting resin. The only mold release you will ever need for silicone and resin is Mann Ease Release 200. I have heard of people using vaseline watered down with alcohol, but it’s messy, harder to work with, and leaves brush marks. I would advise you to just get a can of Ease Release. It makes life easier and lasts a very long time. The can that I bought last year still has plenty left inside.
Sulfur-Free Clay
You will use this to build the first half of your mold.
Clays containing sulfur may be incompatible with some silicones, preventing it from fully curing. I use soft Sculptex clay from Reynolds Advanced Materials. It is sulfur-free and never dries.
If you are making multiple molds with different types of silicone, be sure to keep the clay that you use for tin-cure (Oomoo) and platinum-cure (Moldstar) molds separate. Only use clay you have used for tin-cure molds with other tin-cure silicone, and clay you have used with platinum-cure molds with platinum-cure silicone. Platinum-cure molds like Moldstar are more prone to inhibition, meaning that a variety of factors may prevent it from curing. If you use a clay you have previously used in a tin-cure mold with a platinum-cure mold, it may not fully cure.
Tin Foil
To make things easier, you can use tin foil to fill up voids when you build up the first half of your mold. I will explain this more in part 4 of this tutorial.
Clay tools for smoothing
You will need a tool to smooth out the edges and seams. You can actually just use an old chopstick or anything with a blunt (but not sharp) tip
Latex-free gloves
Latex may prevent your silicone mold from curing. I have actually heard stories of molds that never cured because a box of rubber bands was left next to their mold. That may just be a tall tale but be careful nonetheless. I use nitrile gloves that I bought on Amazon.
Newspaper or old box
Most people just lay a a few layers of newspaper down to prevent the silicone from getting everywhere. I did all my pouring inside of an old plastic bin with newspaper at the bottom for easier cleanup. So even if the silicone spills out it will all be contained in the box.
2. Prep and Plan
The first thing you will need to do is make sure your figure is clean and dust-free by washing it with soap and water. A silicone mold will pick up very fine details, even stray hairs or fingerprints.
Next you need to determine the orientation of your figure inside of the mold. There are three things to keep in mind:
- The natural flow of liquid with gravity
- Where the pour holes (for resin) will be
- Areas where air may get trapped when you pour resin inside the mold
You want to orient your figure so that when you are ready to pour resin inside your mold, there is as much downward flow as possible. Imagine filling up a hollow, transparent glass version of your figure with water. Think of the flow of water as it fills your hollow figure. How would you orient your figure so that the resin will flow and fill it up with the least resistance? It definitely helps to draw diagrams to help you visualize.
Here is a diagram of how I determined my figure’s orientation:
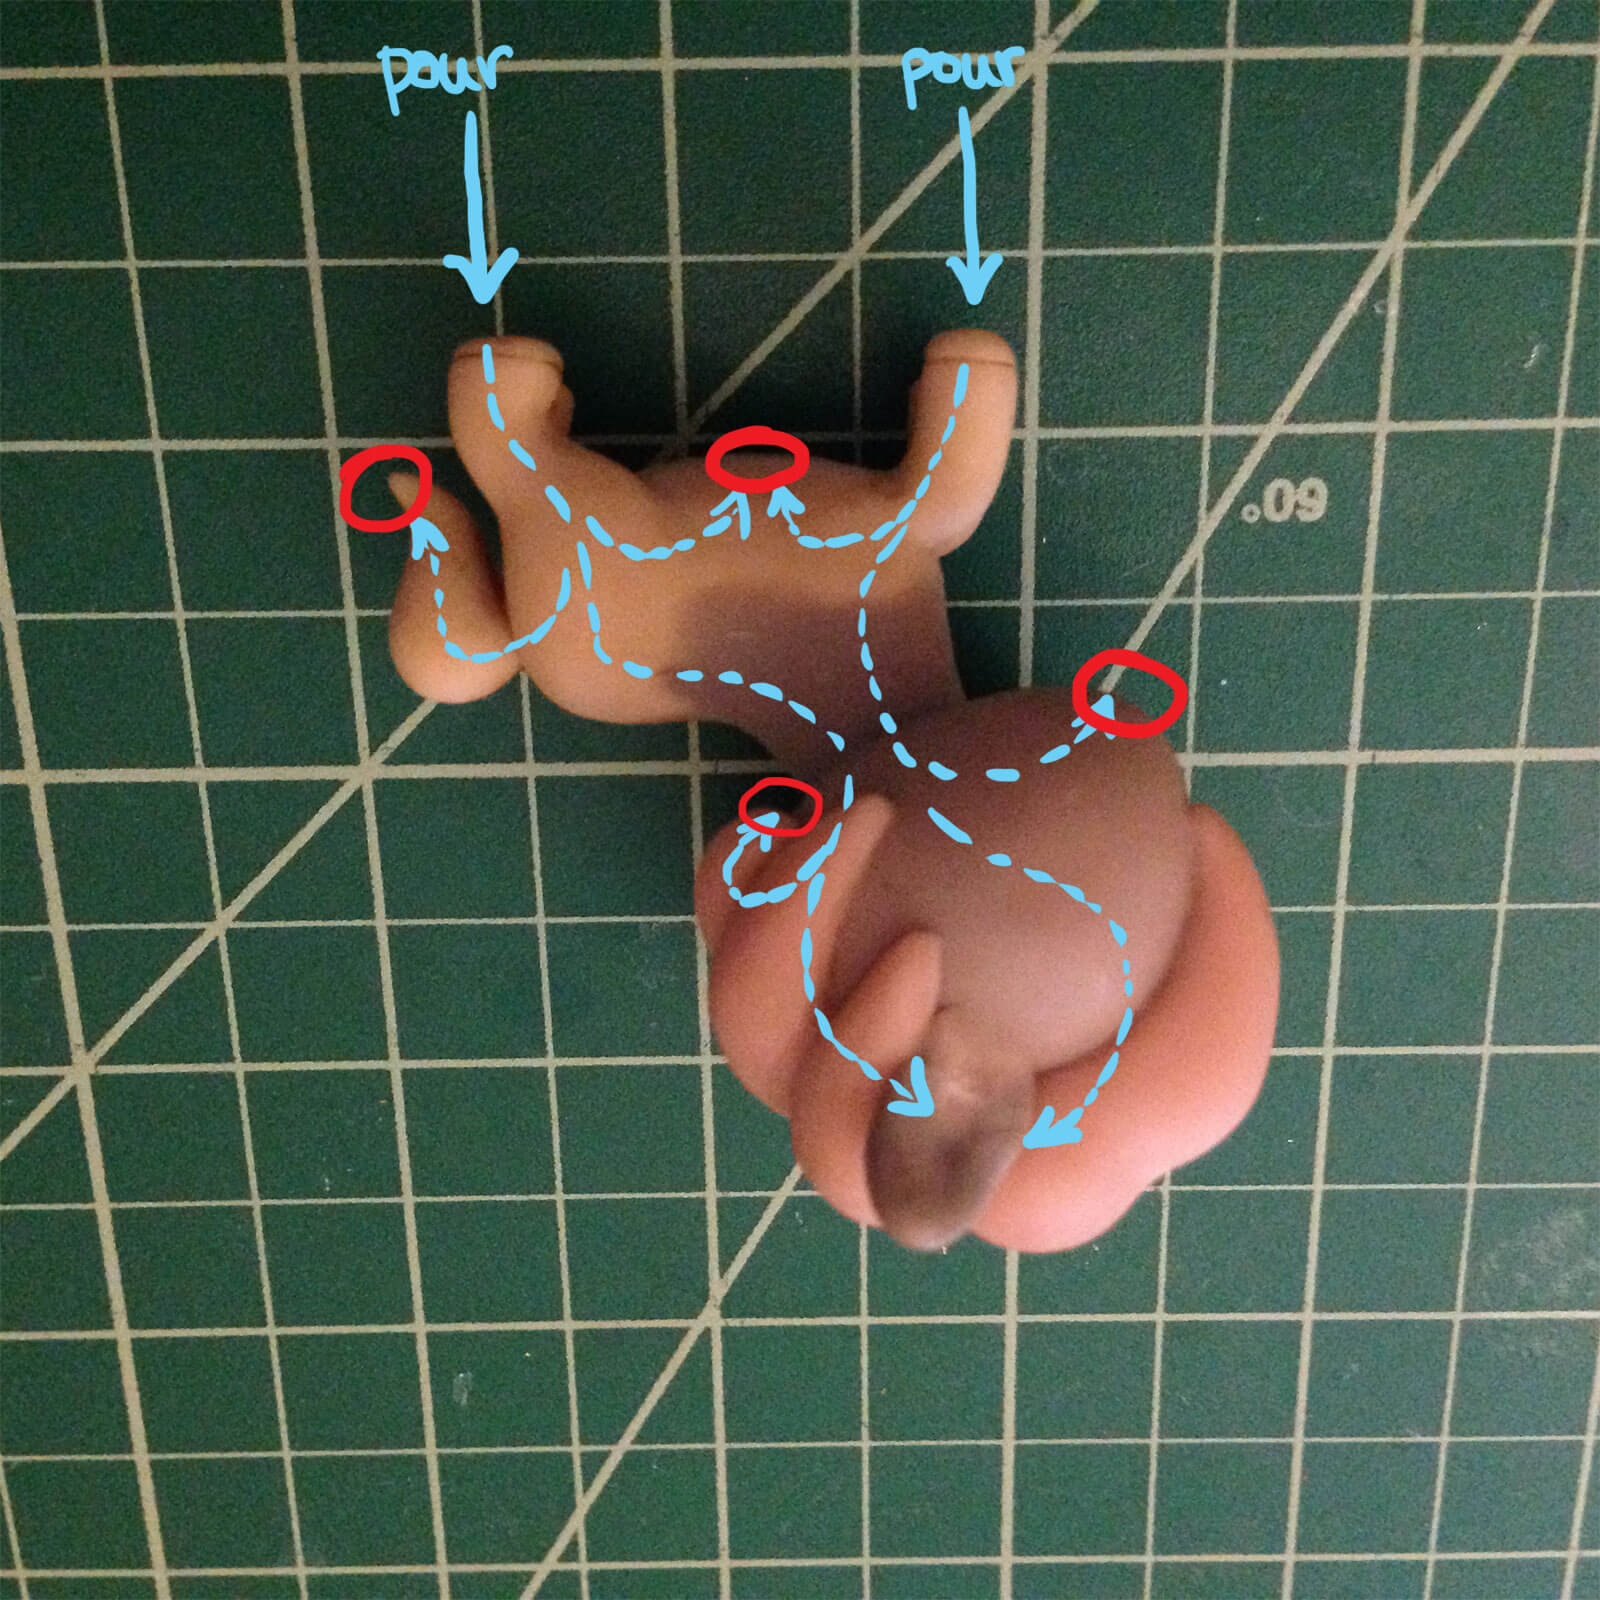
The areas I circled in red are undercuts – areas that cut back up in the mold cavity which will trap air. Anywhere the water needs to flow back UP to fill the cavity is an undercut and will need to be modified with sprues in order to fill all the way up. Sprues are little vents that allow air to escape so your resin can flow all the way through. If you don’t do this, you will have holes in your resin casts where those undercuts are. Even if there are no undercuts in your figure, I would still add one or two sprues anyways.
*Note: Admittedly, I didn’t put sprues in all those red-circled places the first time I made my mold. I had to cut them in using a knife later, once I realized that my resin casts came out with holes in those spots.
3. Make Mold Box
Next, you will need to measure your sculpture to figure out a good size for your mold box.
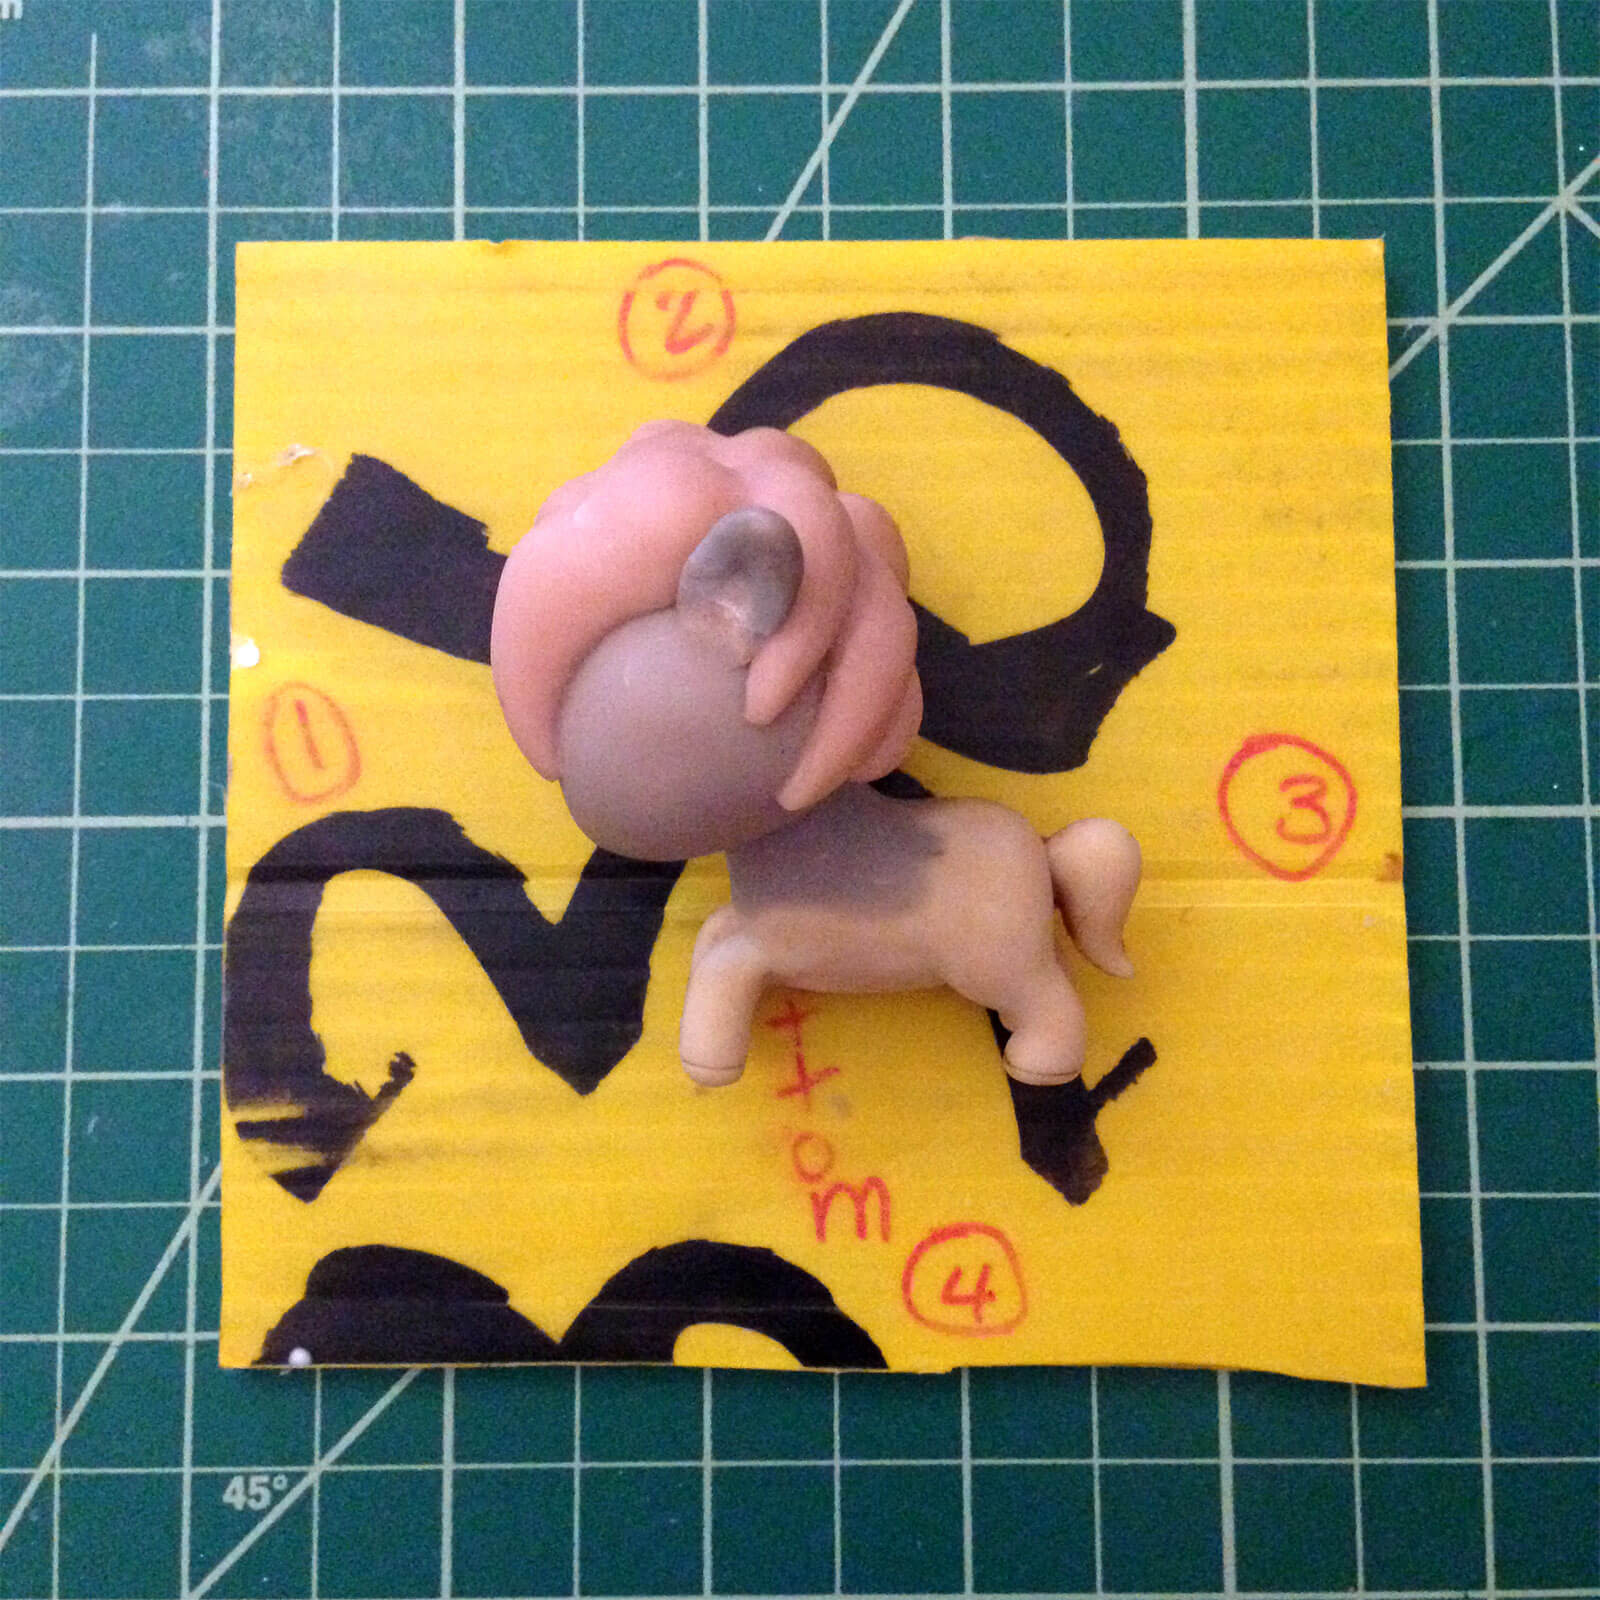
A quick and easy way to estimate the length and width of your box is to place your figure on a piece cardboard and draw a rectangle around it. Allow 3/4 – 1 inch of space around your figure. Cut out the cardboard rectangle – this will be the base of your box.
Notice that I numbered the sides of the box. This is to help me set up the sides of the box after I cut them out.
Determining the height of your mold box takes a little more work. Remember that your figure will be elevated in clay, so you need to make it taller than your figure. To make things easier, make a 1-inch tall pedestal out of a piece of clay and place your figure on it. Then, place a ruler next to it and determine the height about 1.5 – 2 inches above the top of your figure. This will be the height of your mold box. I made the sides of my box 3.75 inches tall.

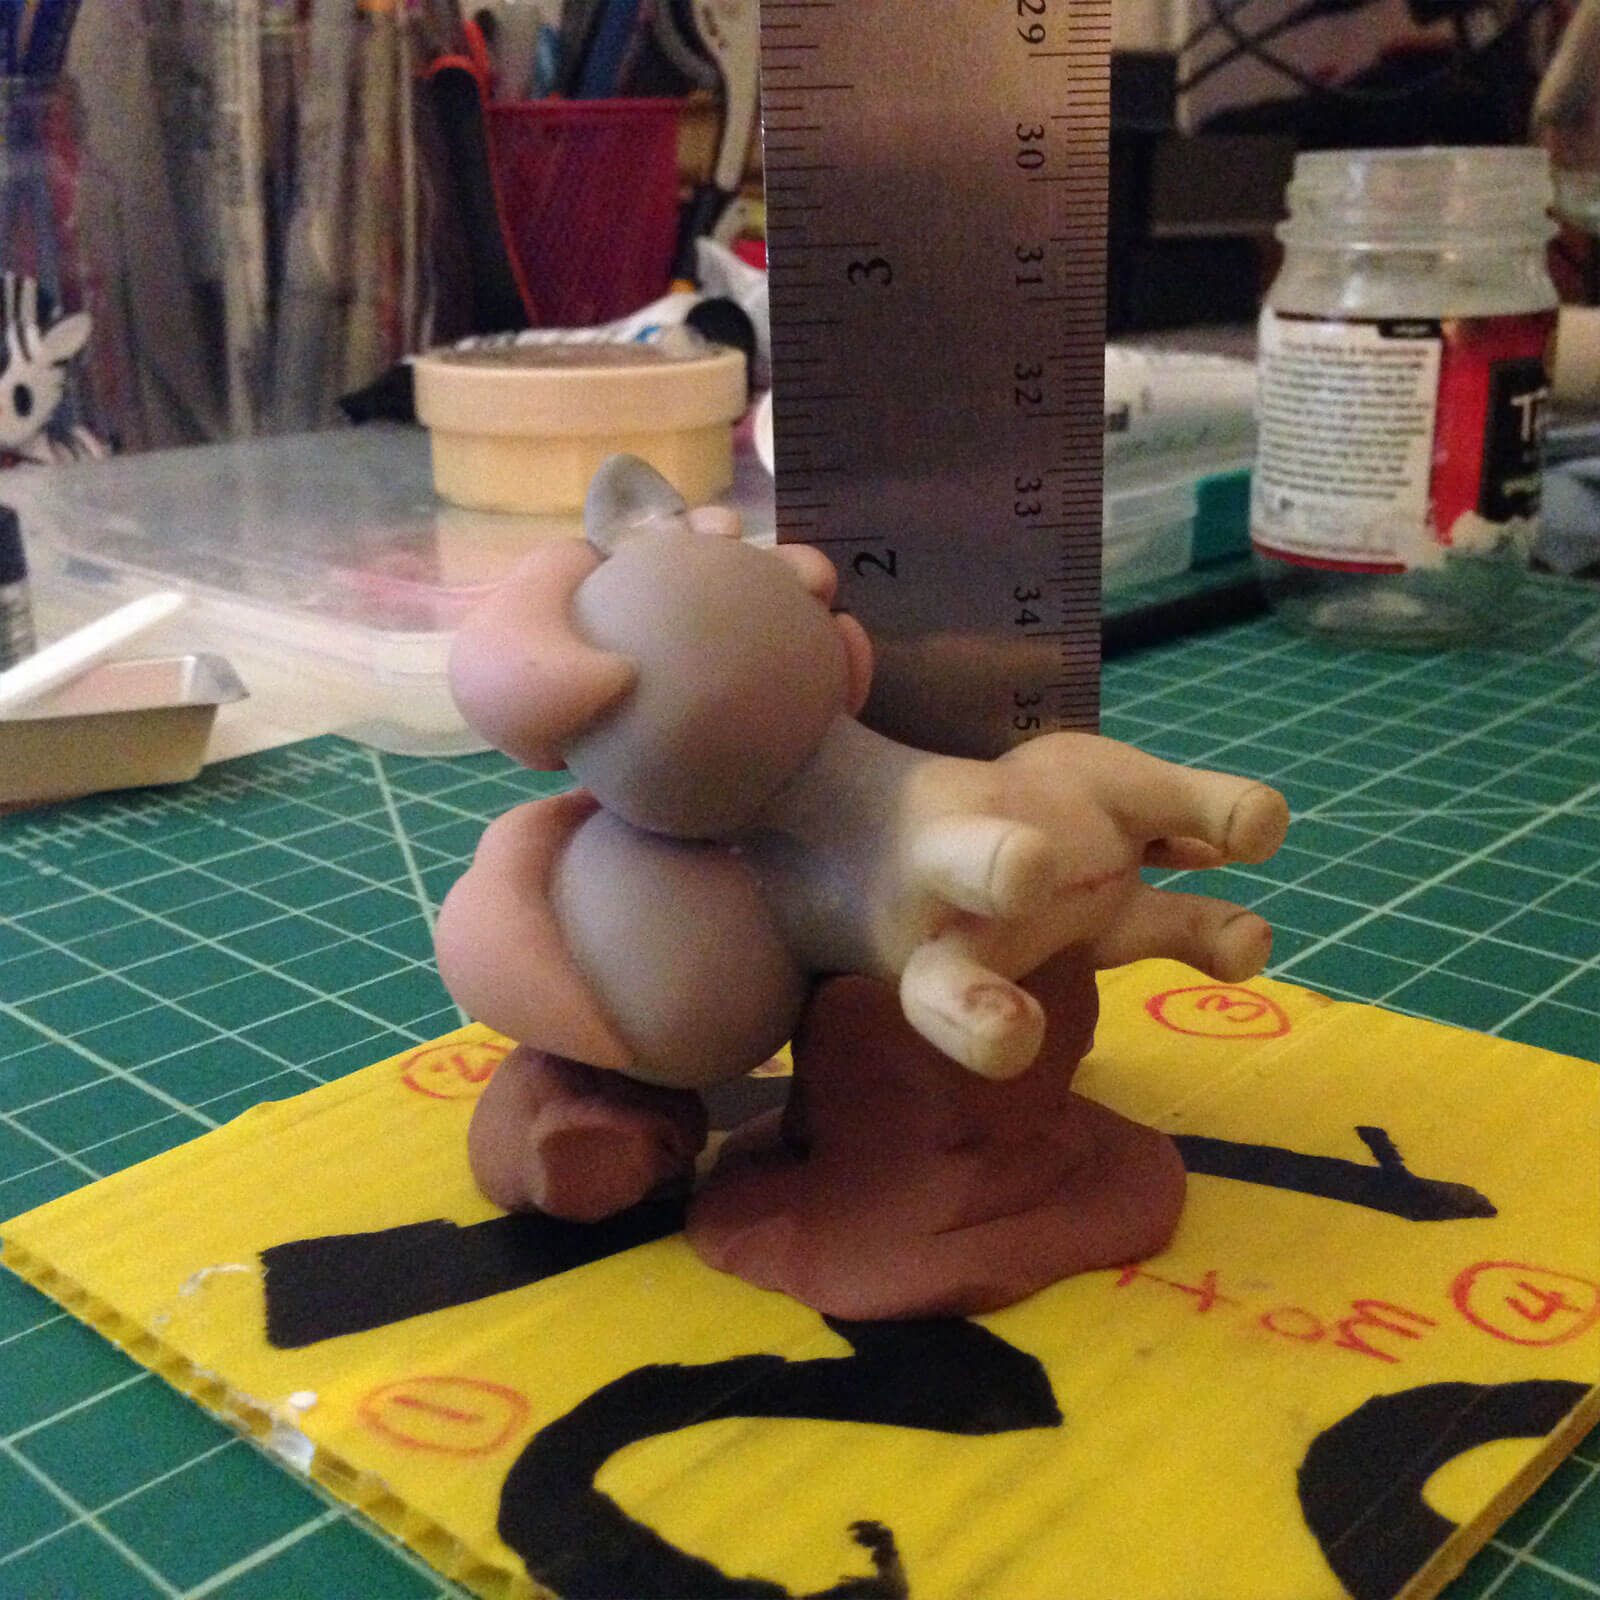
Don’t take your figure off of the pedestal! Set it aside for now. Cut out the remaining 4 sides of your box using the height you just measured and the length x width of the cardboard base.
Using a glue gun, assemble the 4 sides your mold box, without the base. If your cardboard is the thick kind that has a corrugated interior (like my yellow board in this tutorial), make sure to completely seal the interior edges so that the silicone doesn’t seep up inside the walls.
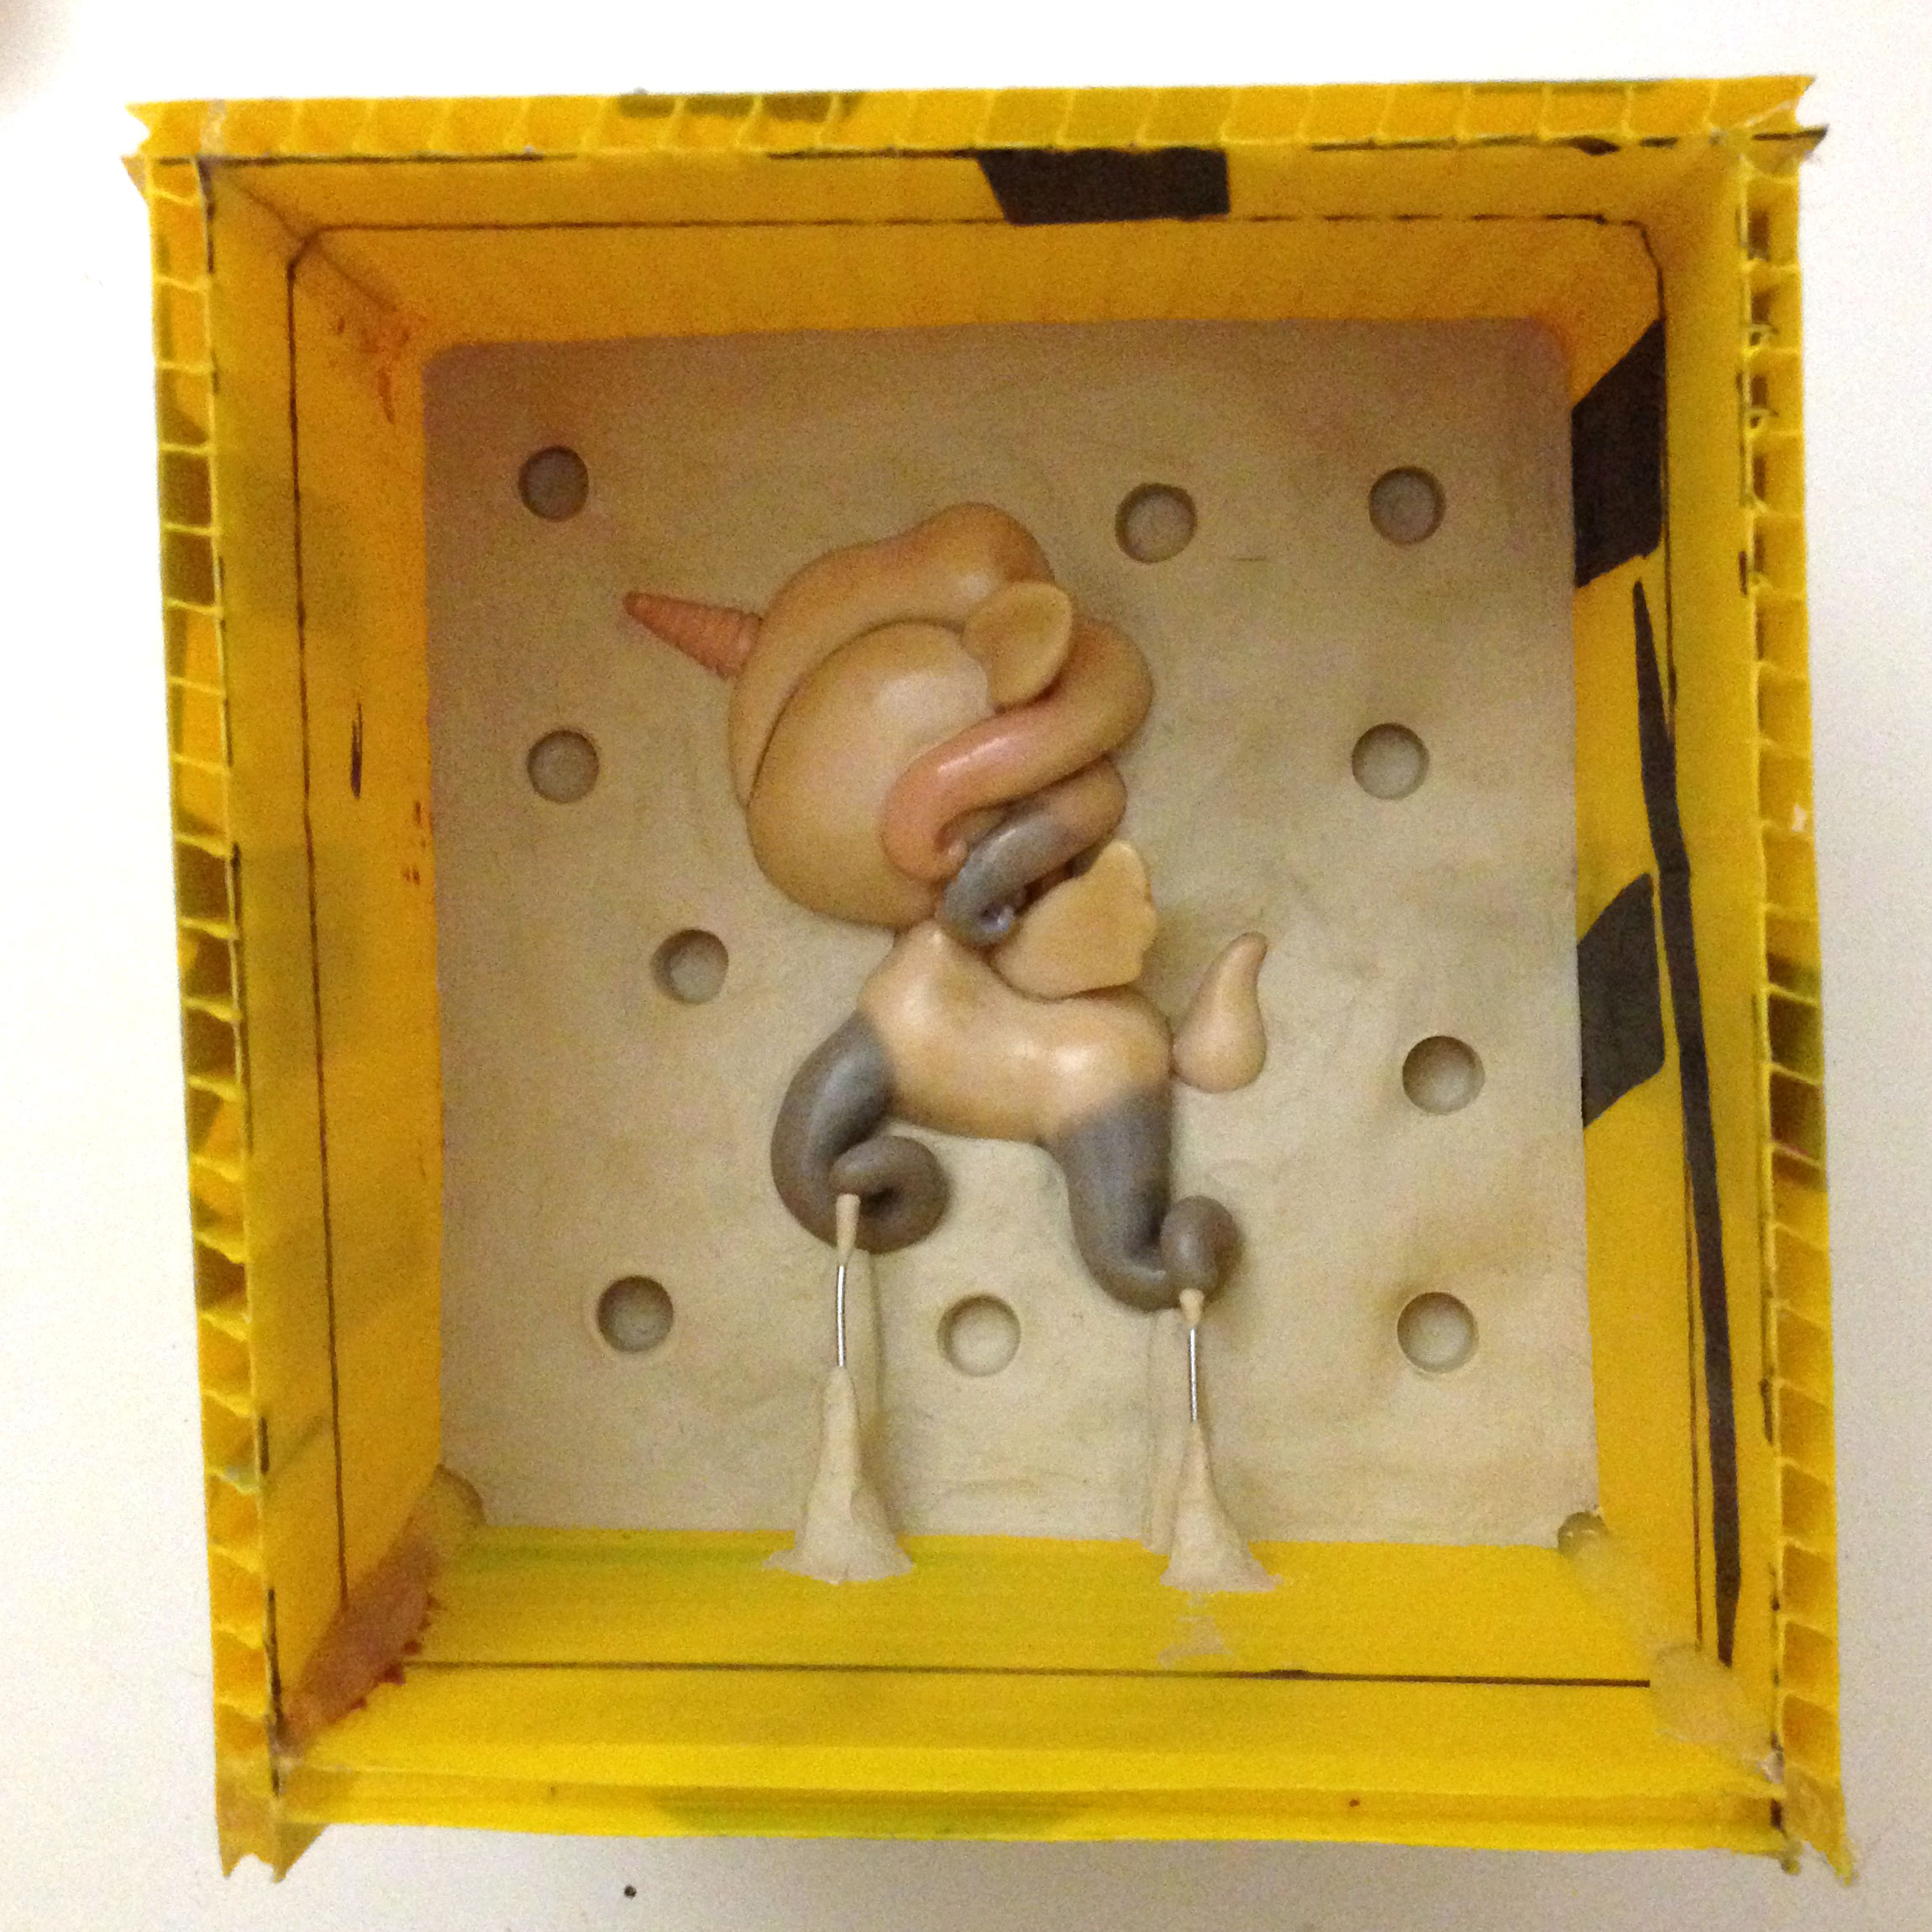
4. Plant Figure
Now you will build up the first half of your mold with clay. This is the most labor-intensive part. Some people will simply lay down a bunch of clay and then press their figure into it. This only works if your figure is one solid piece, and fairly small. If I tried to do that with my custom Unicornos the sculpted legs would all break off.
Here’s my method:
Take your figure and plant it securely in the base of the mold box. Remember how we planned your figure orientation in Step 2? When you are attaching your figure, remember where you are going to put your pour holes and how you will orient your figure.
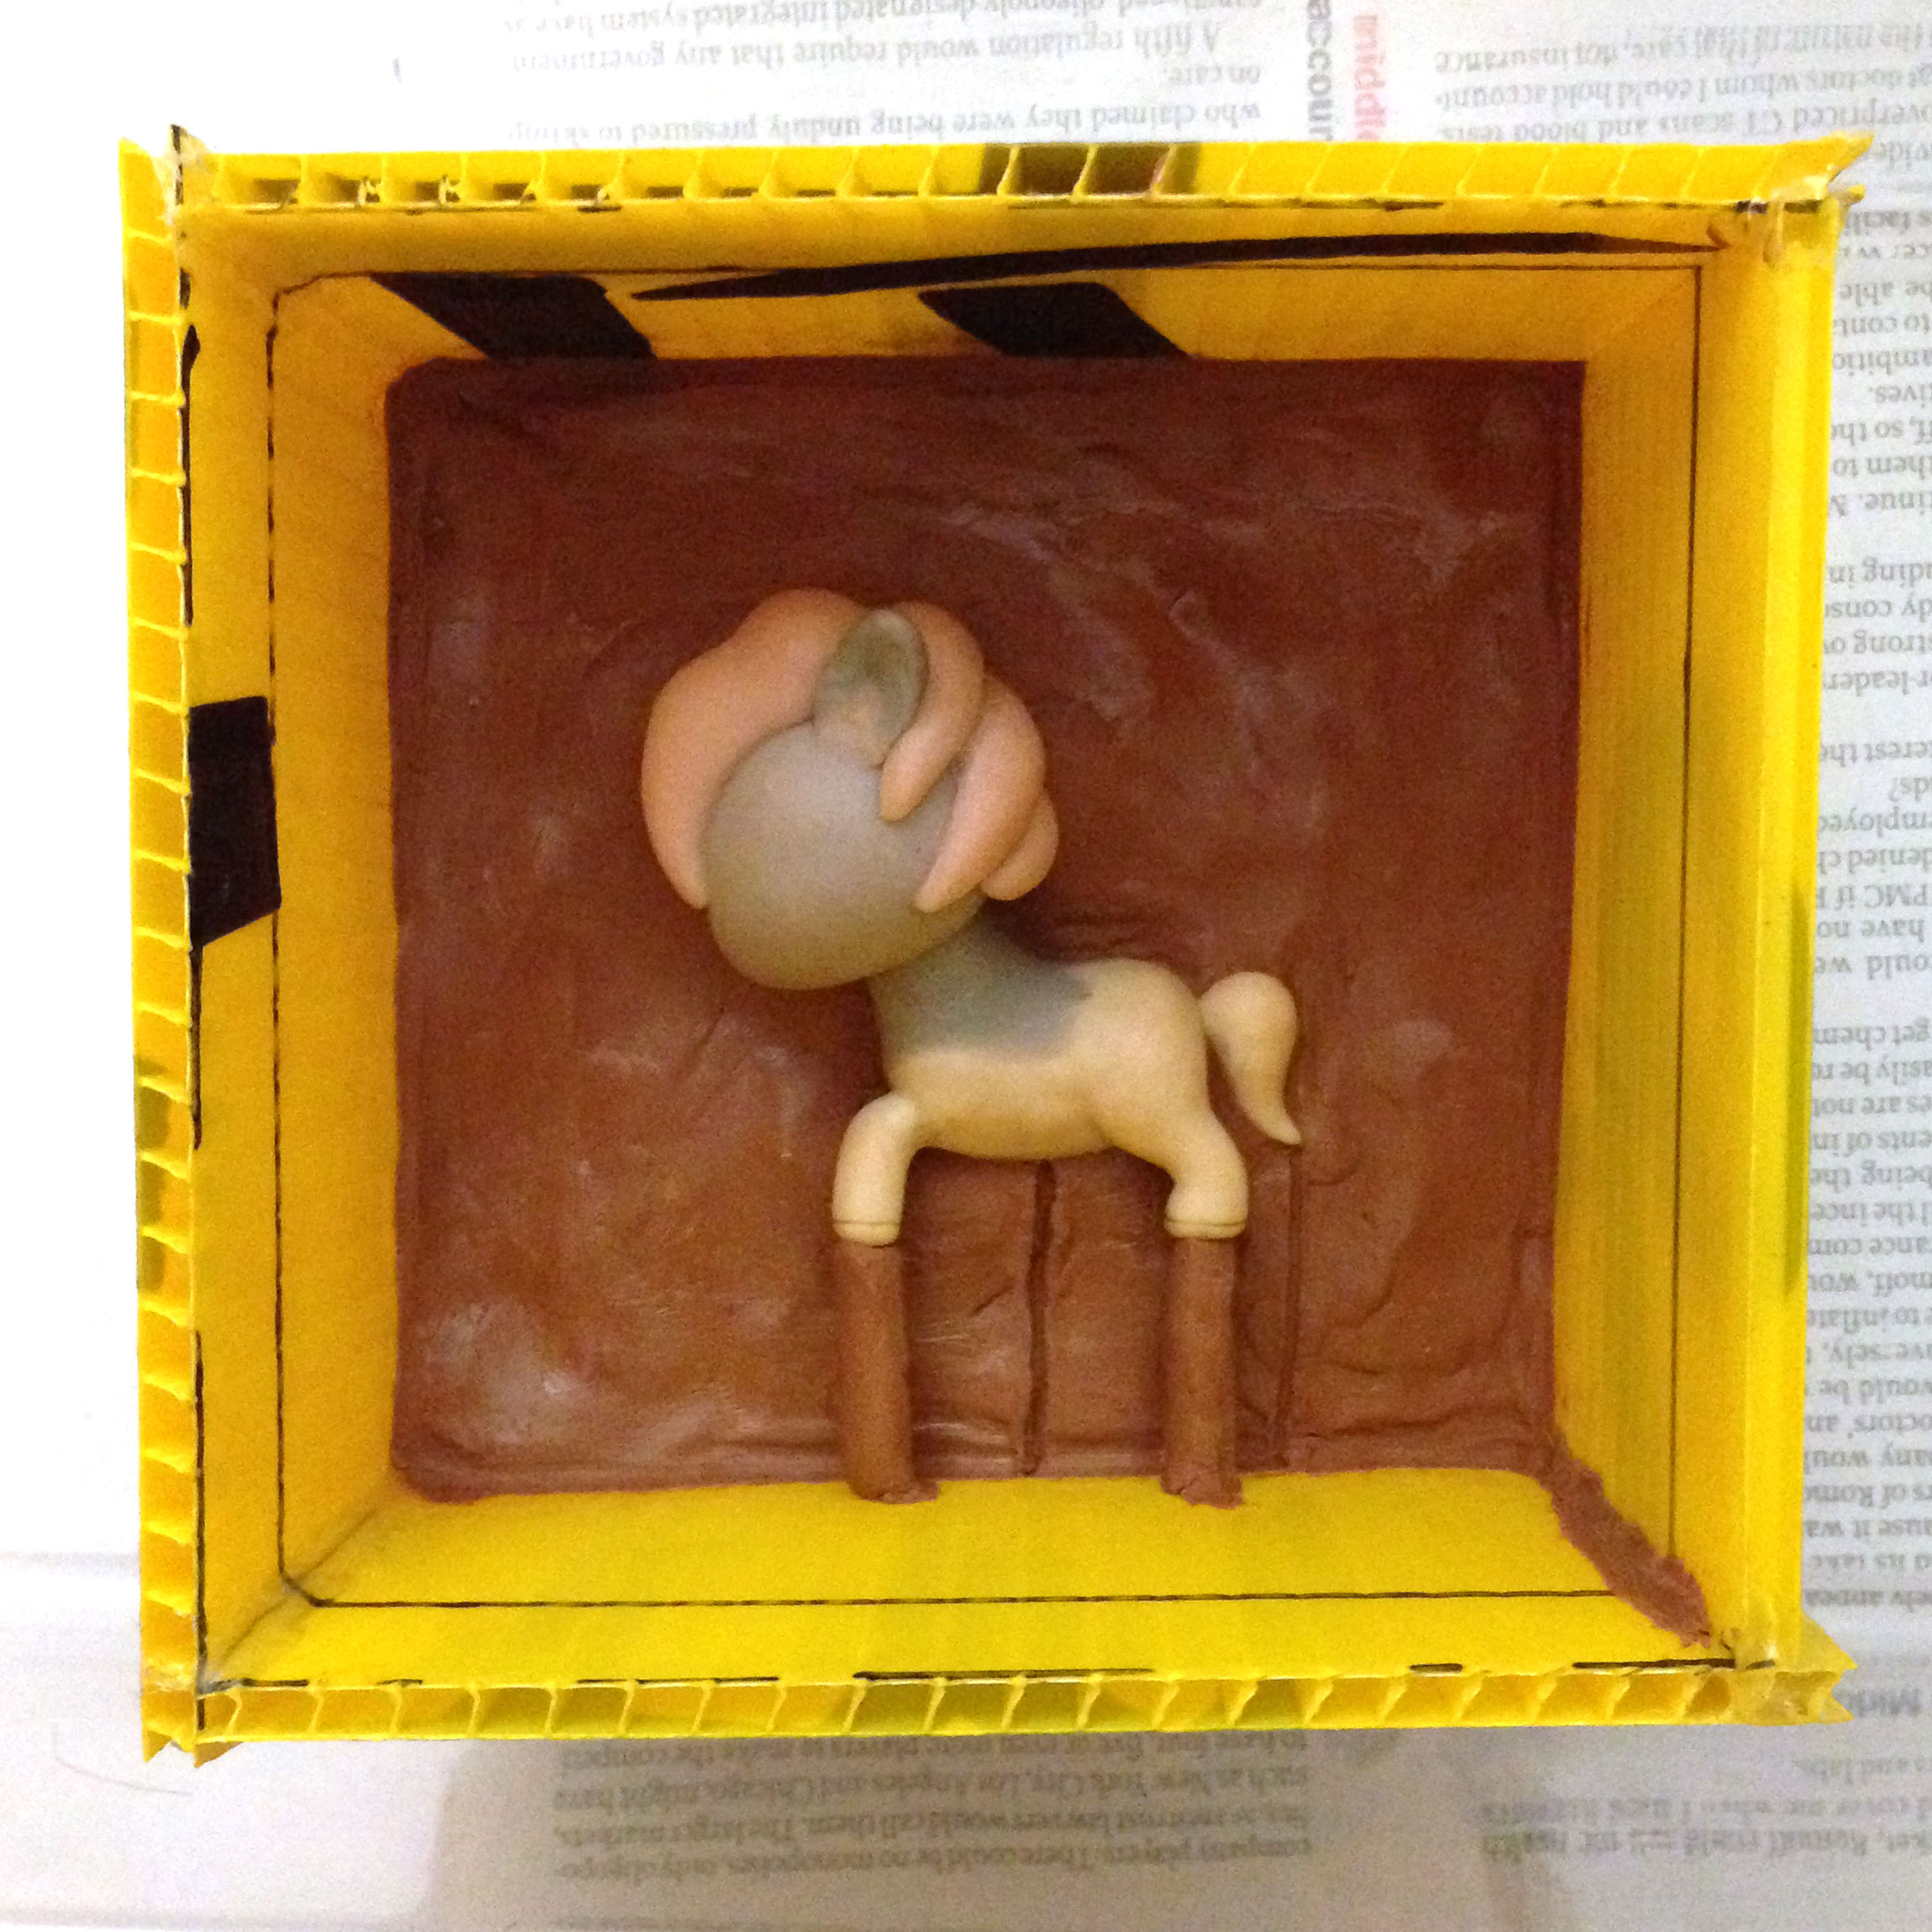
Modify your figure/pedestal combo by adding clay around it up to the halfway point of your sculpture. Smooth out all the seams and make sure that there are no holes between your figure and the clay.
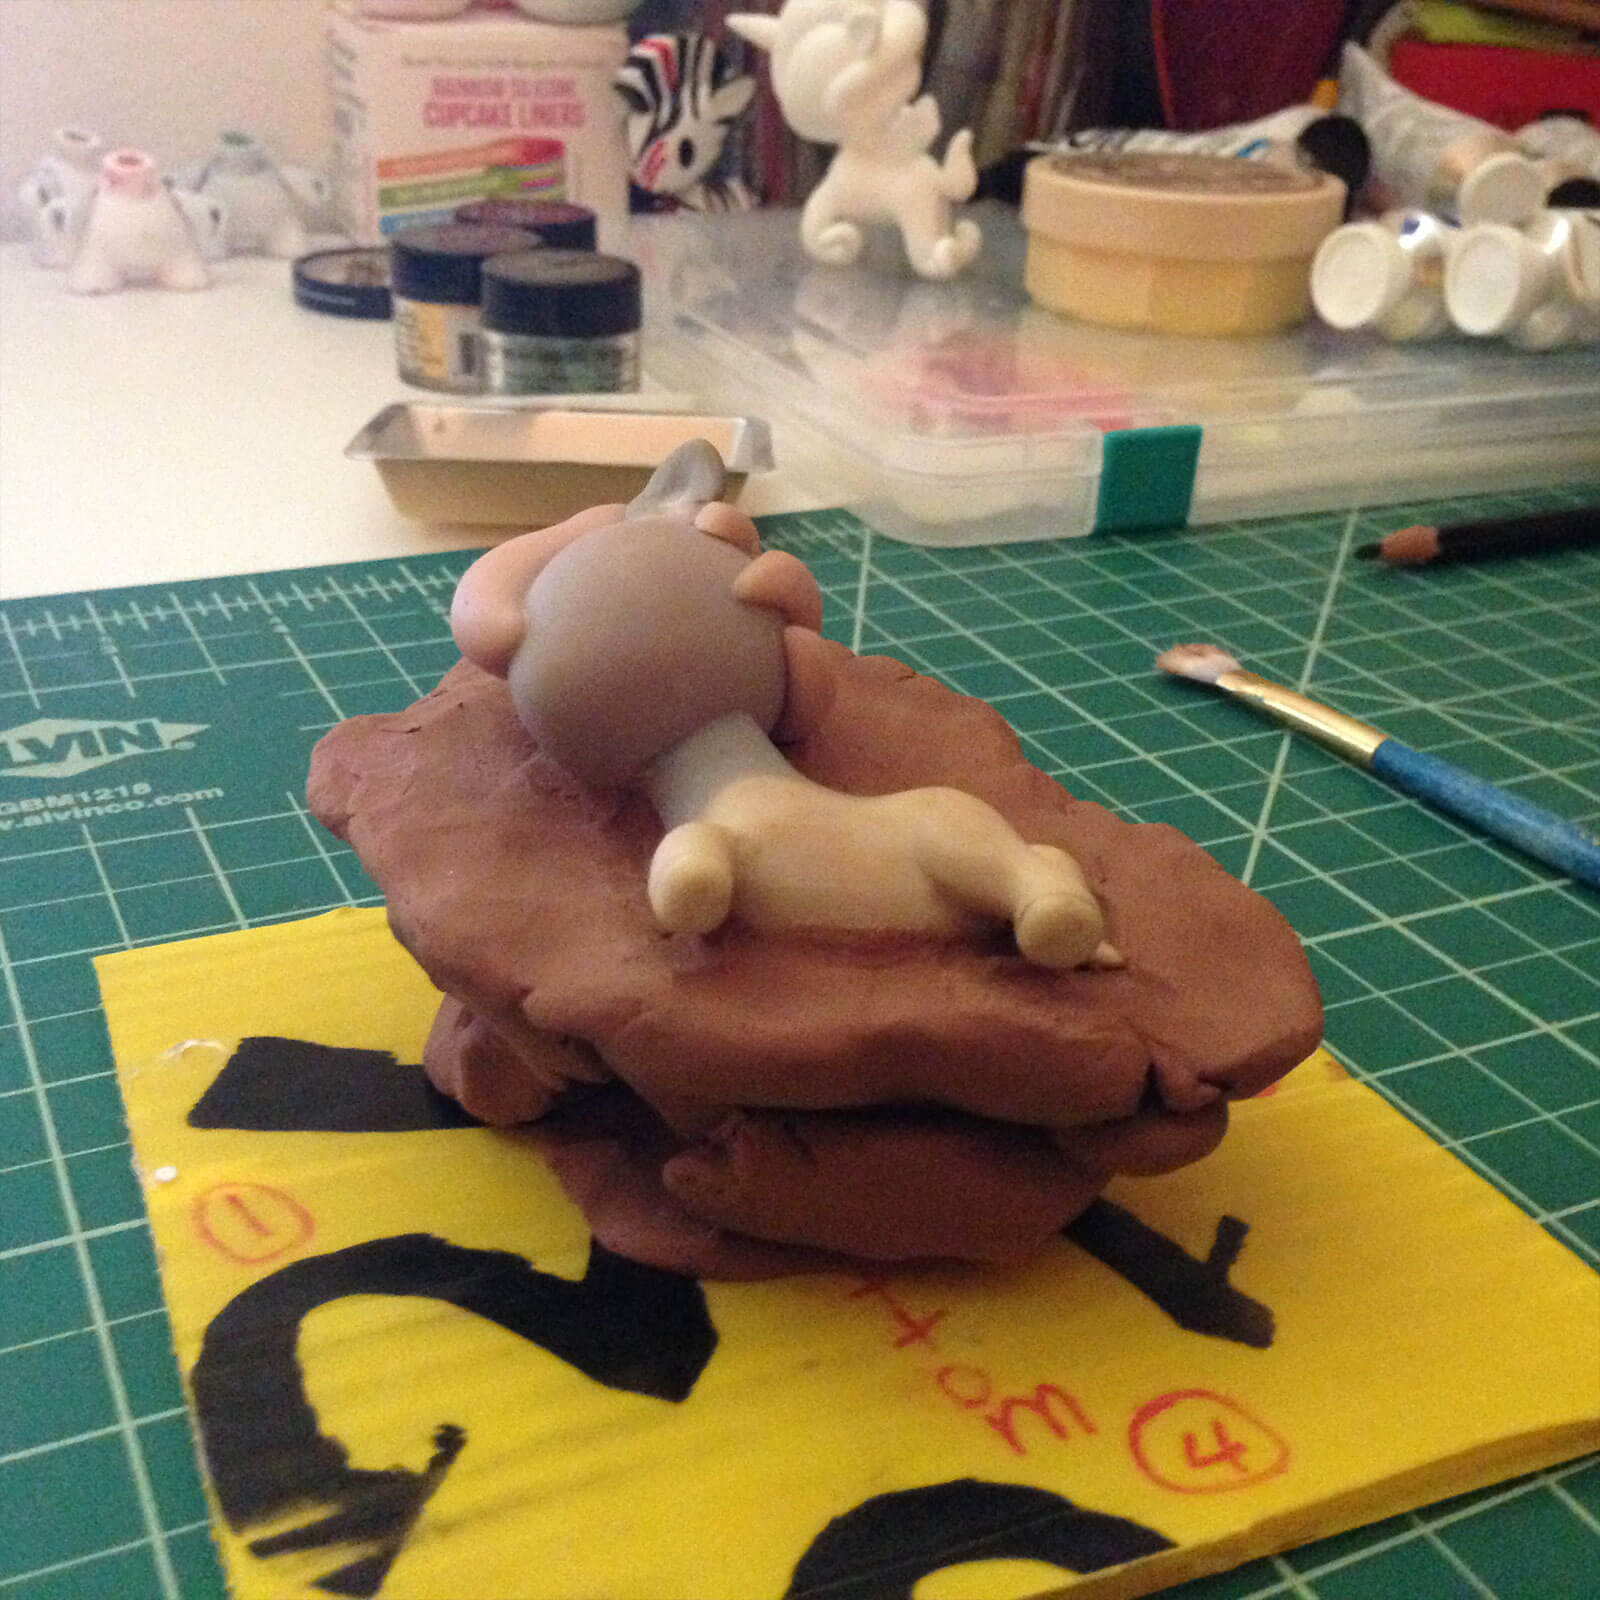
Add some loosely crumpled aluminum foil around your figure, but don’t let it rise above the pedestal. This is filler material so you don’t have to use clay to fill up all that empty space.
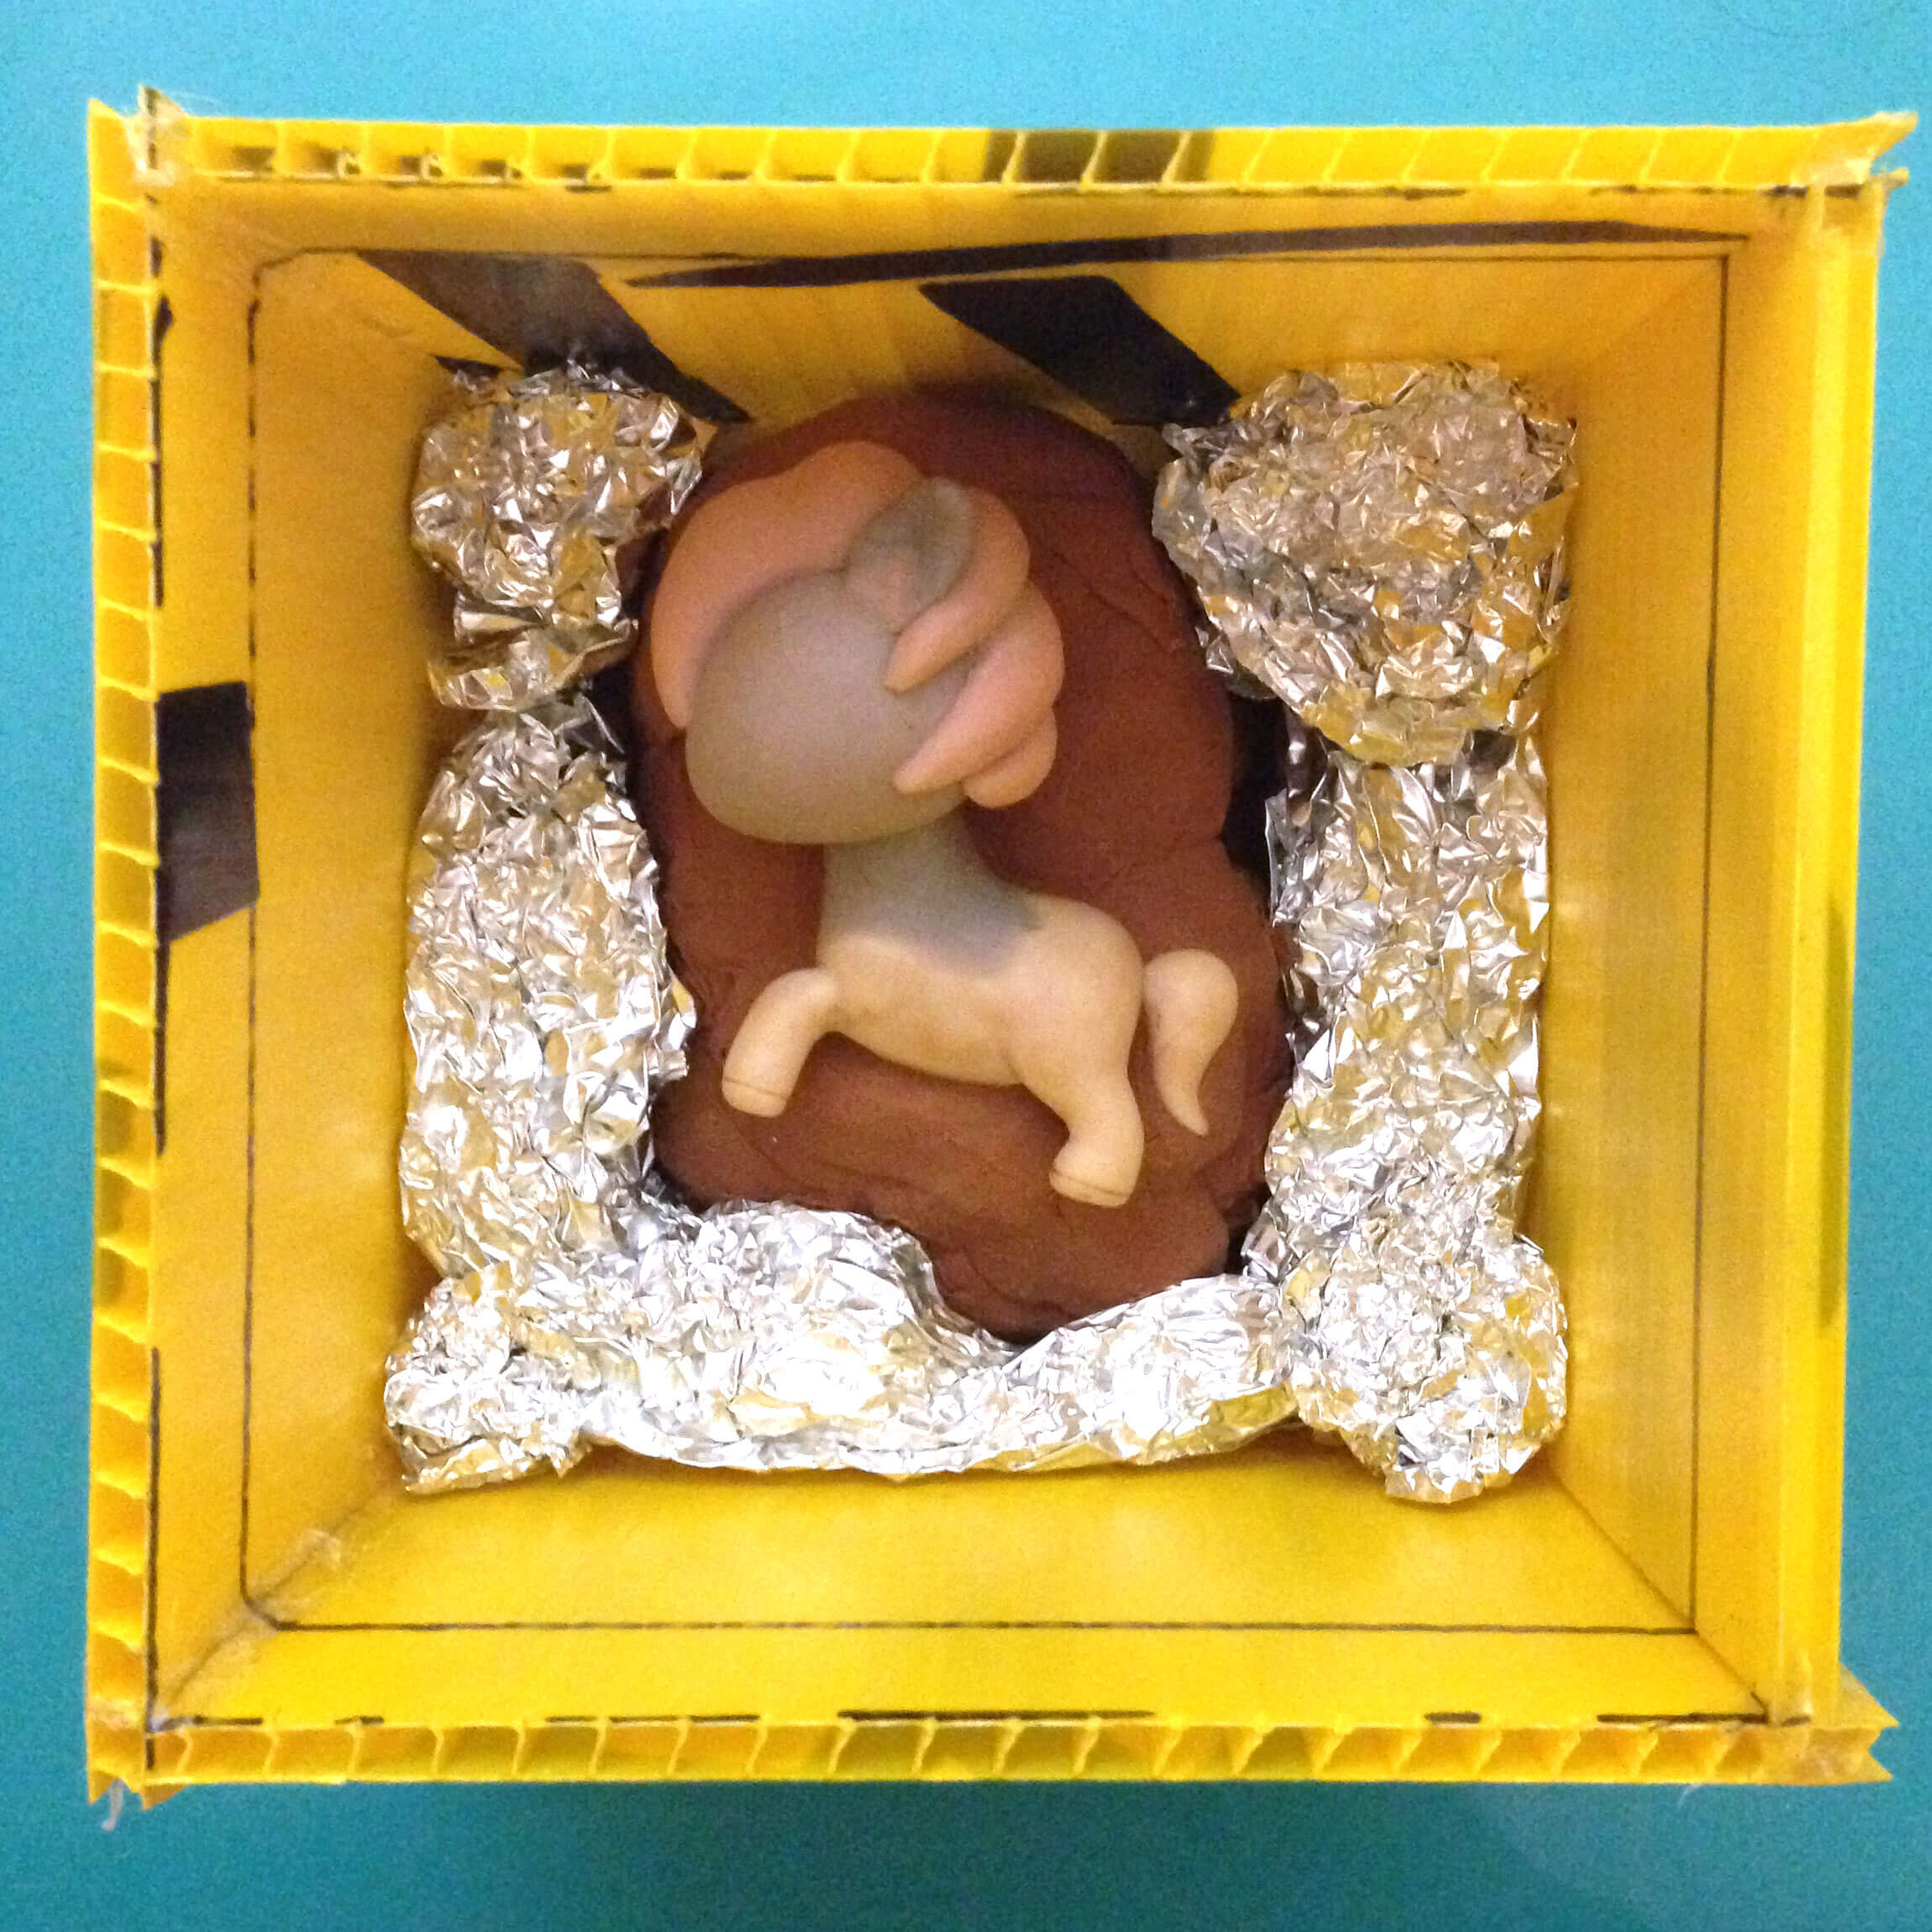
Lay clay on top of the aluminum foil and blend it with the clay that is already around your figure. Keep going until you have completely covered any gaps and sealed/smoothed out all edges.
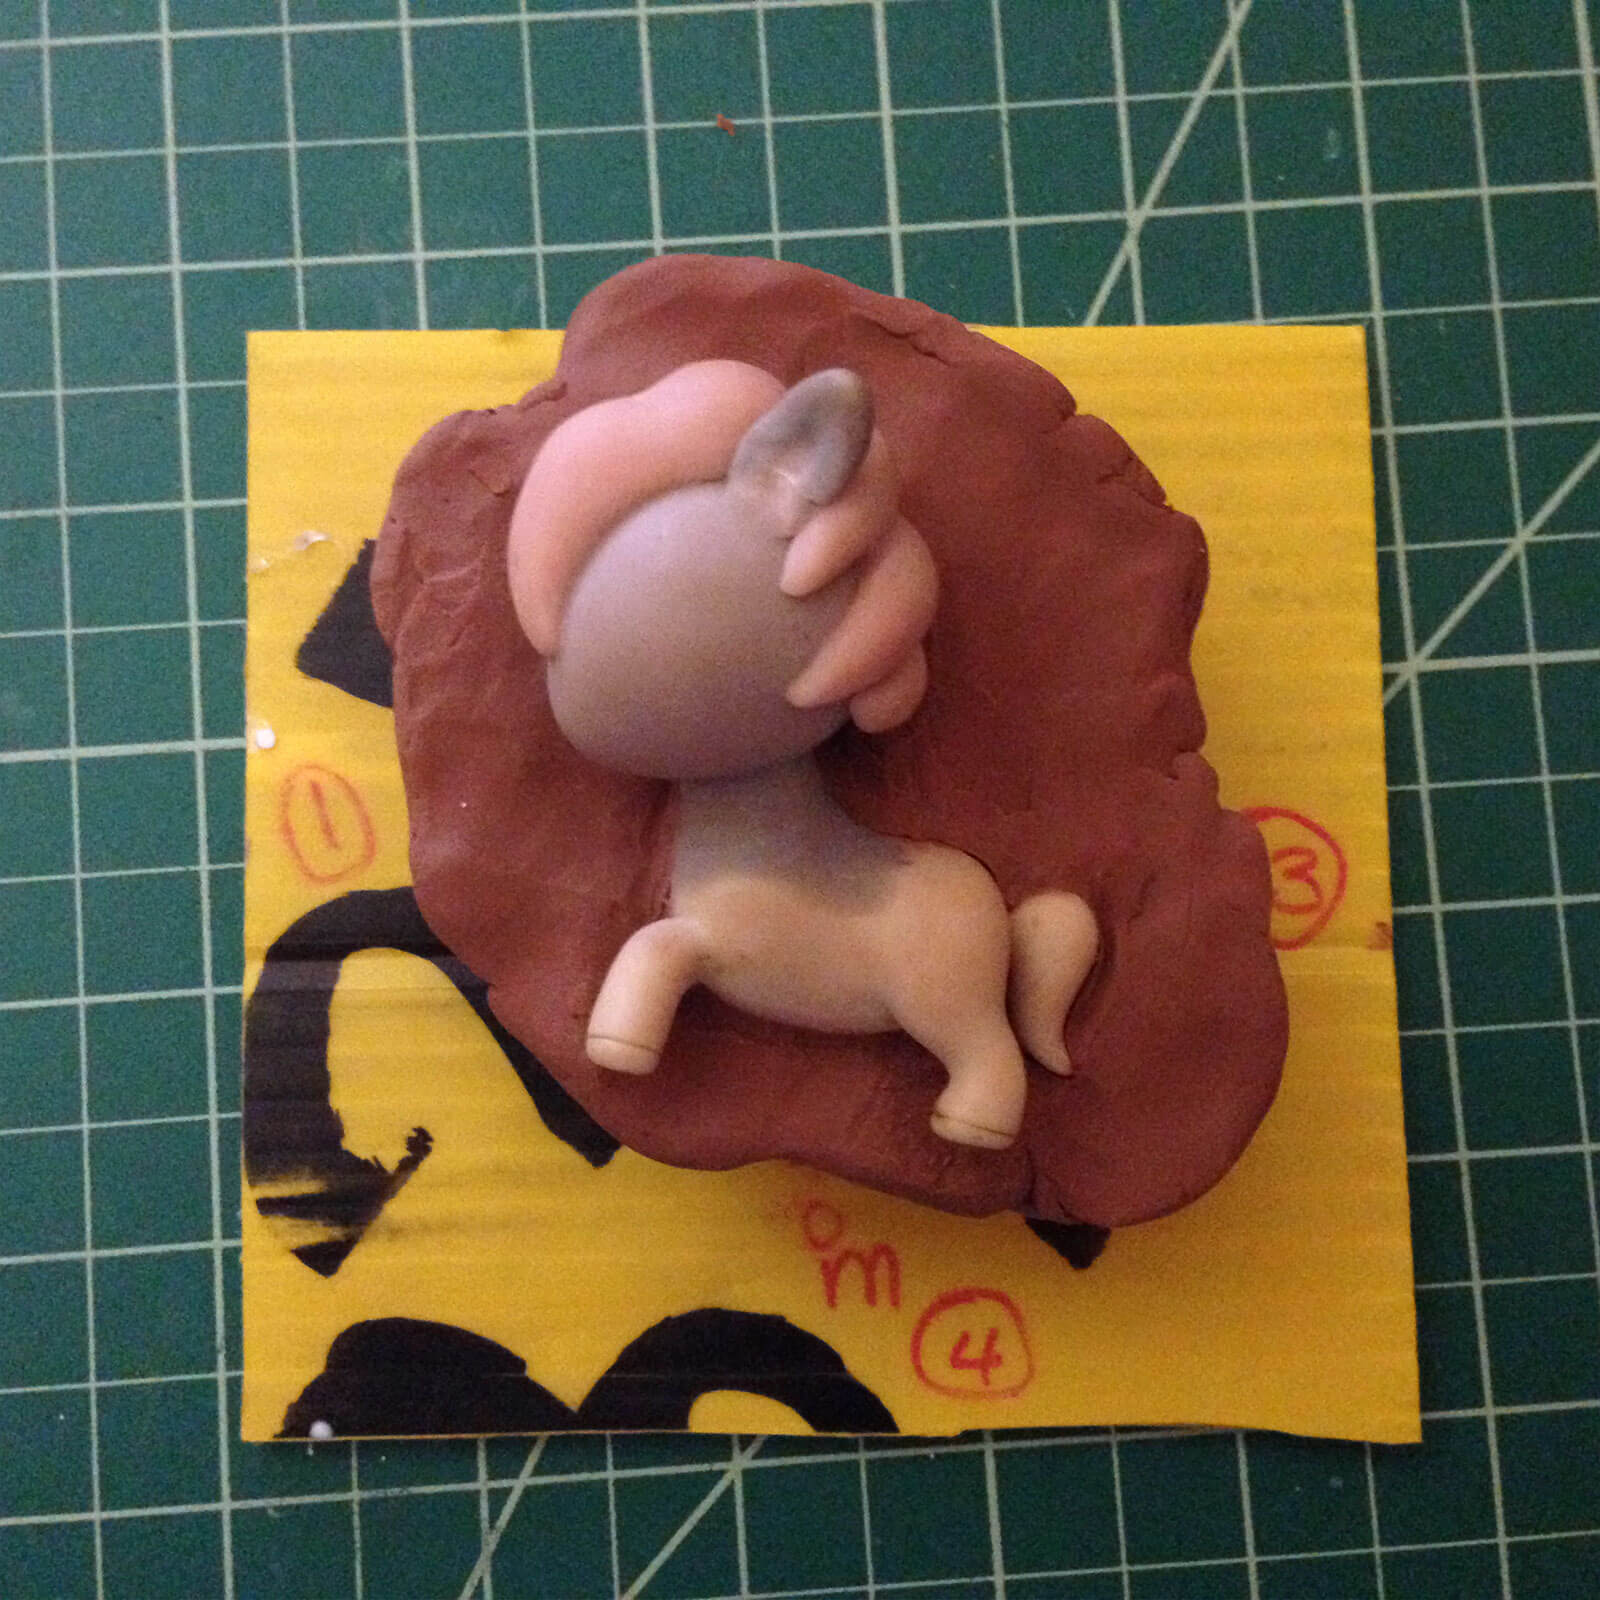
Add clay funnels where you want your pour holes to be. I added funnels to the legs. At the very end when both halves of the mold finished curing, I used an exacto knife to split this area open to remove my figure.
For the sprues, I carved out thin, shallow lines where I know air will be trapped (remember, we determined these areas in Step 2).
Use the end of a pen or paintbrush to push some shallow holes around the clay. These are “keys” and they will keep the two halves of your mold lined up together. Don’t make them too deep or they will poke through the clay and you will have to seal it up again. Also, if the holes are too deep the keys will rip off when you try to separate the two halve of the mold.
Finally, spray a coat of Ease Release all over the clay and exposed parts of your figure.
I took this photo before I added the keys, so just imagine a bunch of pockmarks all around the clay. I have added a photo of a different mold showing the shallow holes I made with the end of a marker.
5. First Pour
Ready for the first pour? Oomoo reacts when you mix two equal parts of A and B together (by volume). To measure two equal volumes without a measuring cup, place a popsicle stick along the inside of a disposable cup. On the stick, mark a spot that is about 1/3 up the side of the cup from the bottom. Mark two different cups at this same spot.
Fill one cup up to the mark with part A, and fill the other cup with part B. Then mix the contents of the two cups together.
Next is pouring, which is actually a little tricky. Here are a few pouring tips to help you avoid air bubbles and get the best outcome:
- Pick the lowest corner of your box, and only pour from that corner. Pouring all over will only result in trapped air.
- Avoid pouring directly on top of your figure. Again, this could trap air. Just pour in one corner and let the silicone slowly fill up.
- Pour in thin streams from a height (at least a couple feet above your mold box). Most air bubbles that formed while mixing will pop on the way down if you do this. I have my mold box on the ground and pour while standing on my knees. It will take a while to pour the silicone this way and your arms will get tired, but have patience!
Once you have poured all of the silicone from the first cup, just make another batch and pour again. As long as you get all your pouring done within the “pot life” time indicated on your silicone package, you’re fine. If at any time you notice a leak in your mold box, stop pouring and plug up the leak with a chunk of clay.
Keep pouring batches of silicone until you have completely covered your figure.
If you’re a beginner like me, you probably don’t have a vacuum chamber to degas (eliminate bubbles from) your mold. I actually used my boyfriend’s electric razor to vibrate the bubbles out. This is where having another box comes in handy. I placed the electric razor inside of a plastic bag, and placed the bag in the plastic bin next to my mold box. I turned on the razor and just left it on until the batteries died.
Now you wait for the silicone to cure! I like to pour the first half at night before I go to bed, so that it will be ready when I wake up in the morning. If you pour during the day, you now have 6 hours to do binge-watch your favorite show on Netflix.
6. Second Pour
Once the first half of your mold has cured, flip over your entire mold box and carefully remove the base without tearing the walls. Use a knife to help you cut off the base if you need to. Carefully take out the aluminum foil and clay. DO NOT remove your figure from the mold. Clean off any clay that has stuck to your figure. I like to remove stubborn bits of clay with a qtip dipped in rubbing alcohol.

Spray a generous coat of Ease Release over everything again and wait for it to dry. Now you are ready to make your final pour. Use the same process from Step 4: mix the silicone, pour from one corner, and pour from a height. Again, if you notice a leak, plug it up with some clay.
*Note: If you forgot to spray Ease Release before the second pour (as I have done before), all is not lost. You can try to save the mold by making it a one-part mold. (See my One-Part Mold Tutorial)
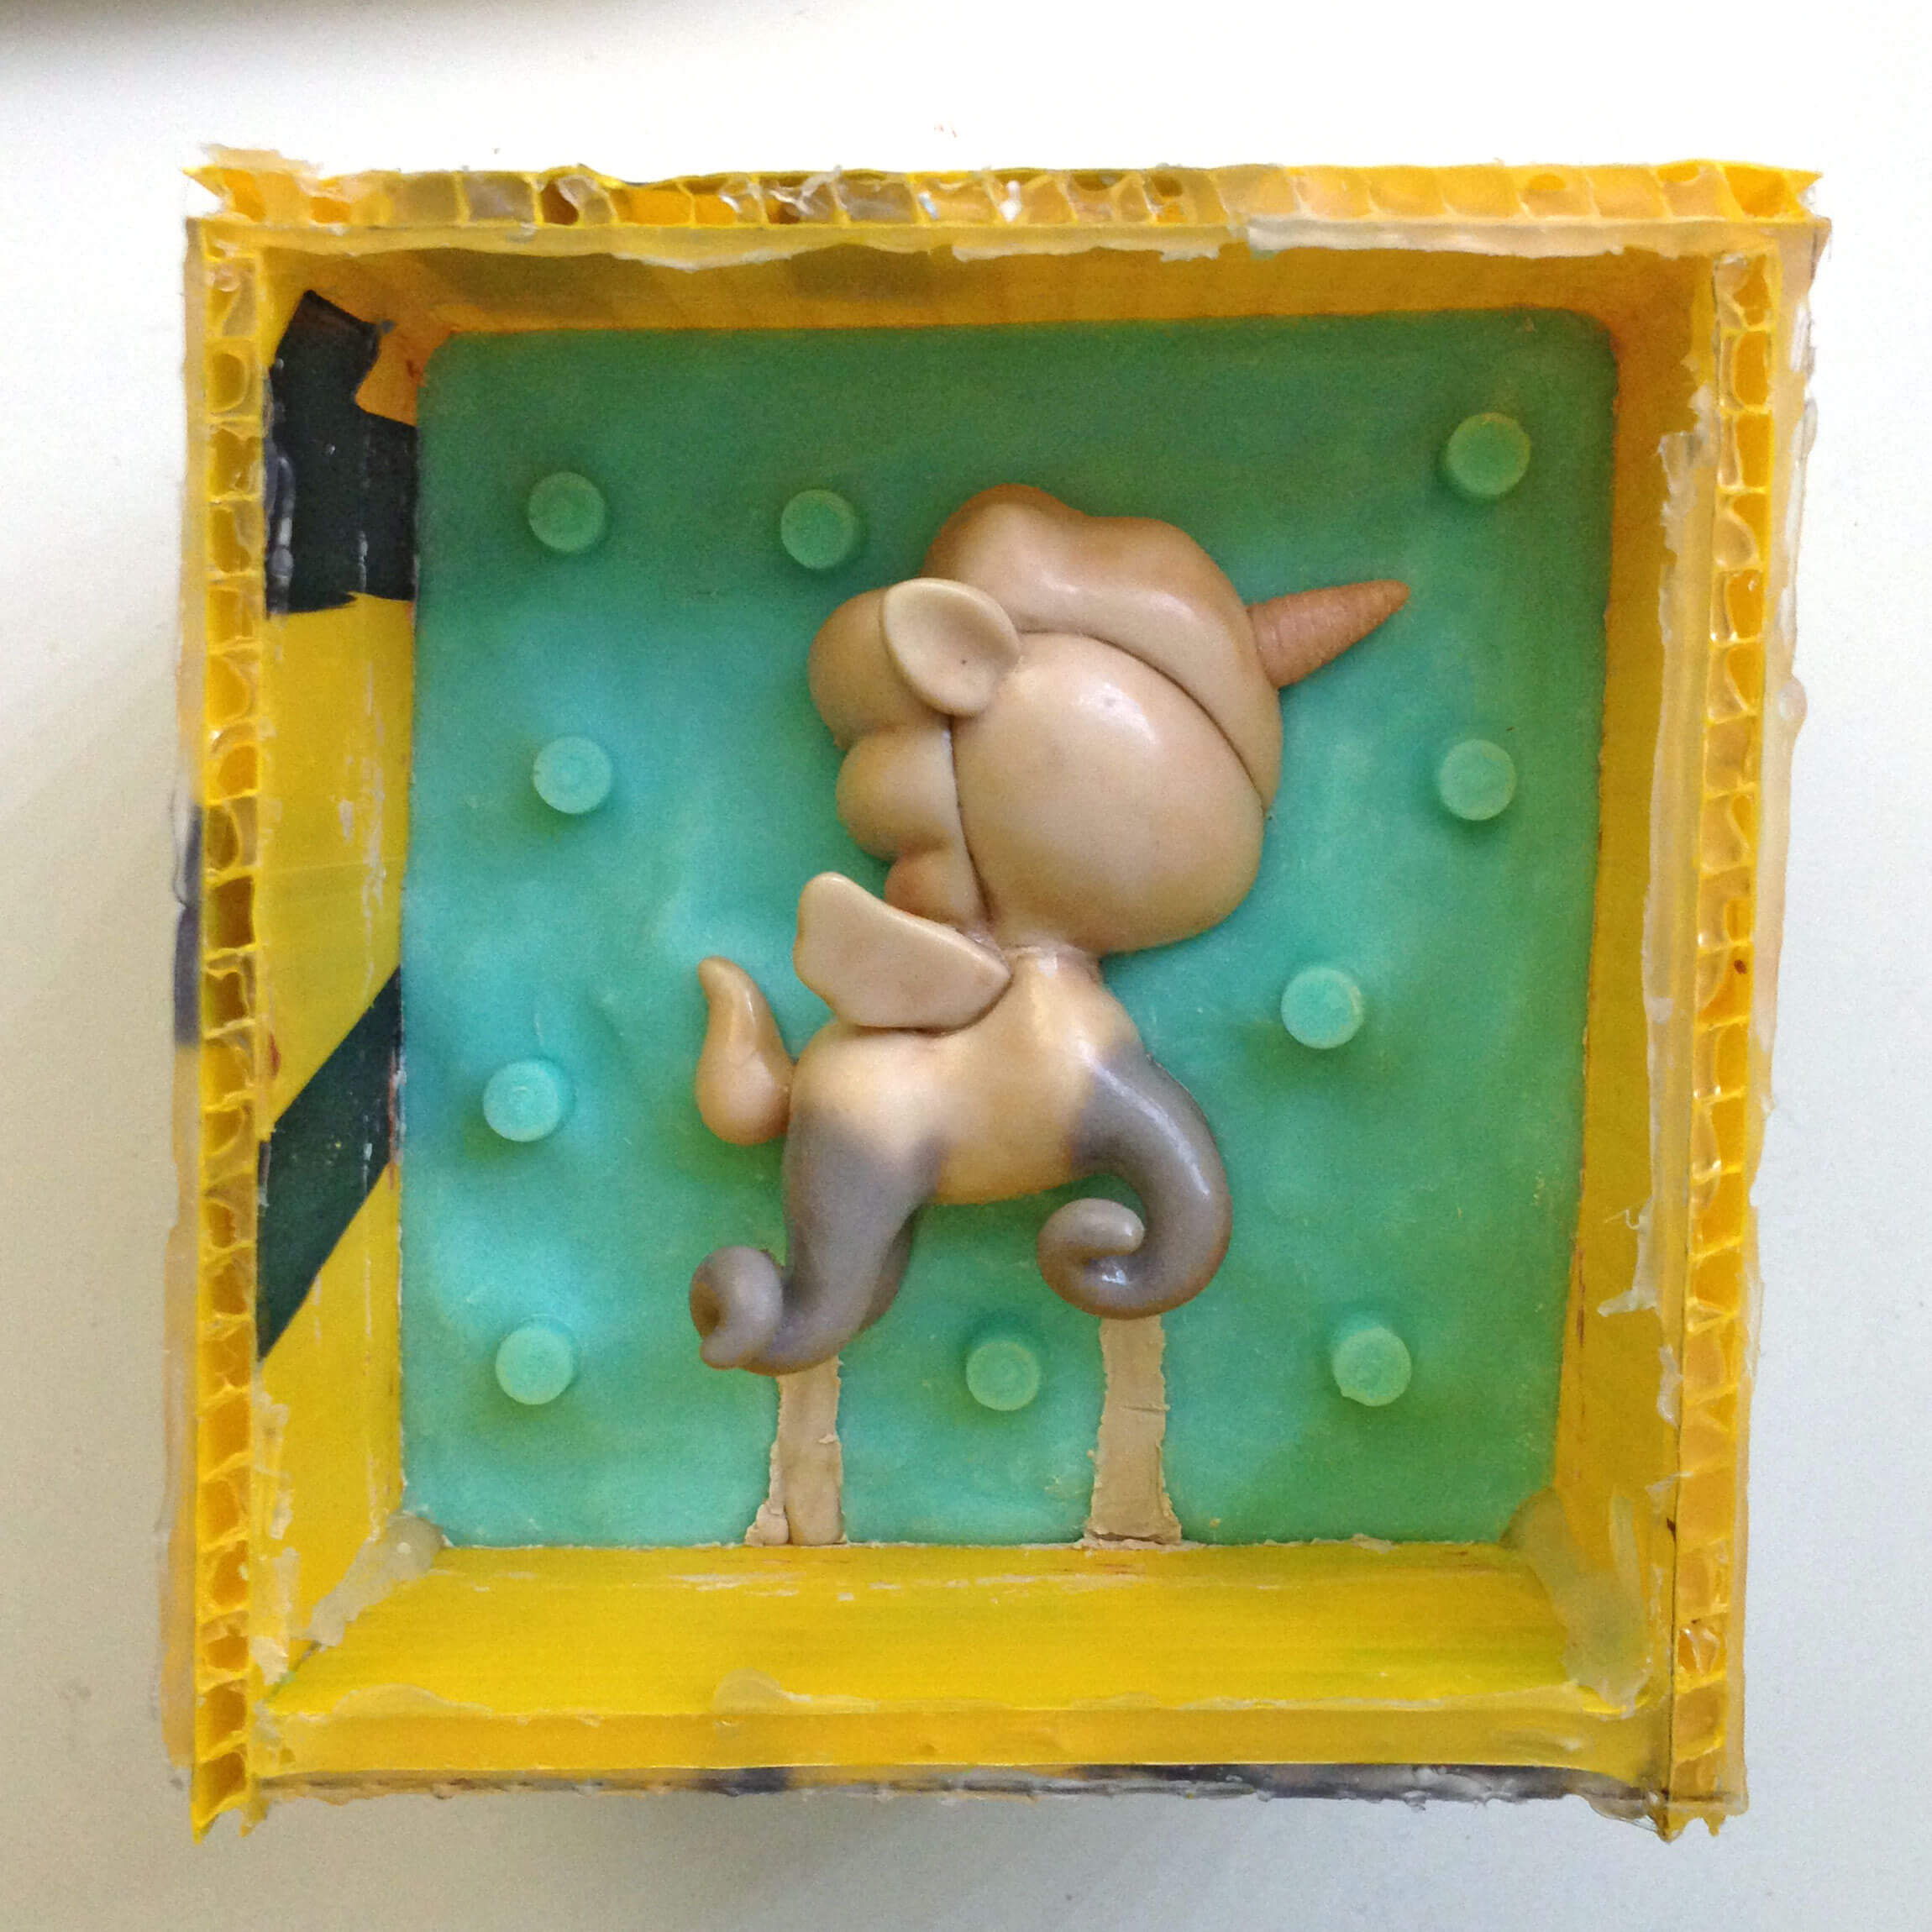
7. Demold
Once your second half is done curing, it’s time to remove your figure! Break open one side of the mold box and peel it away from the silicone block that is now your mold. I don’t know why I did this, but I was actually able to wiggle my mold out of the box without breaking any of the sides open. It would have been easier to just break the box, but it was really satisfying to leave it all in one piece. I’ve actually been using the same 4-walled box for multiple molds throughout the year and it still hasn’t broken (knock on wood)!
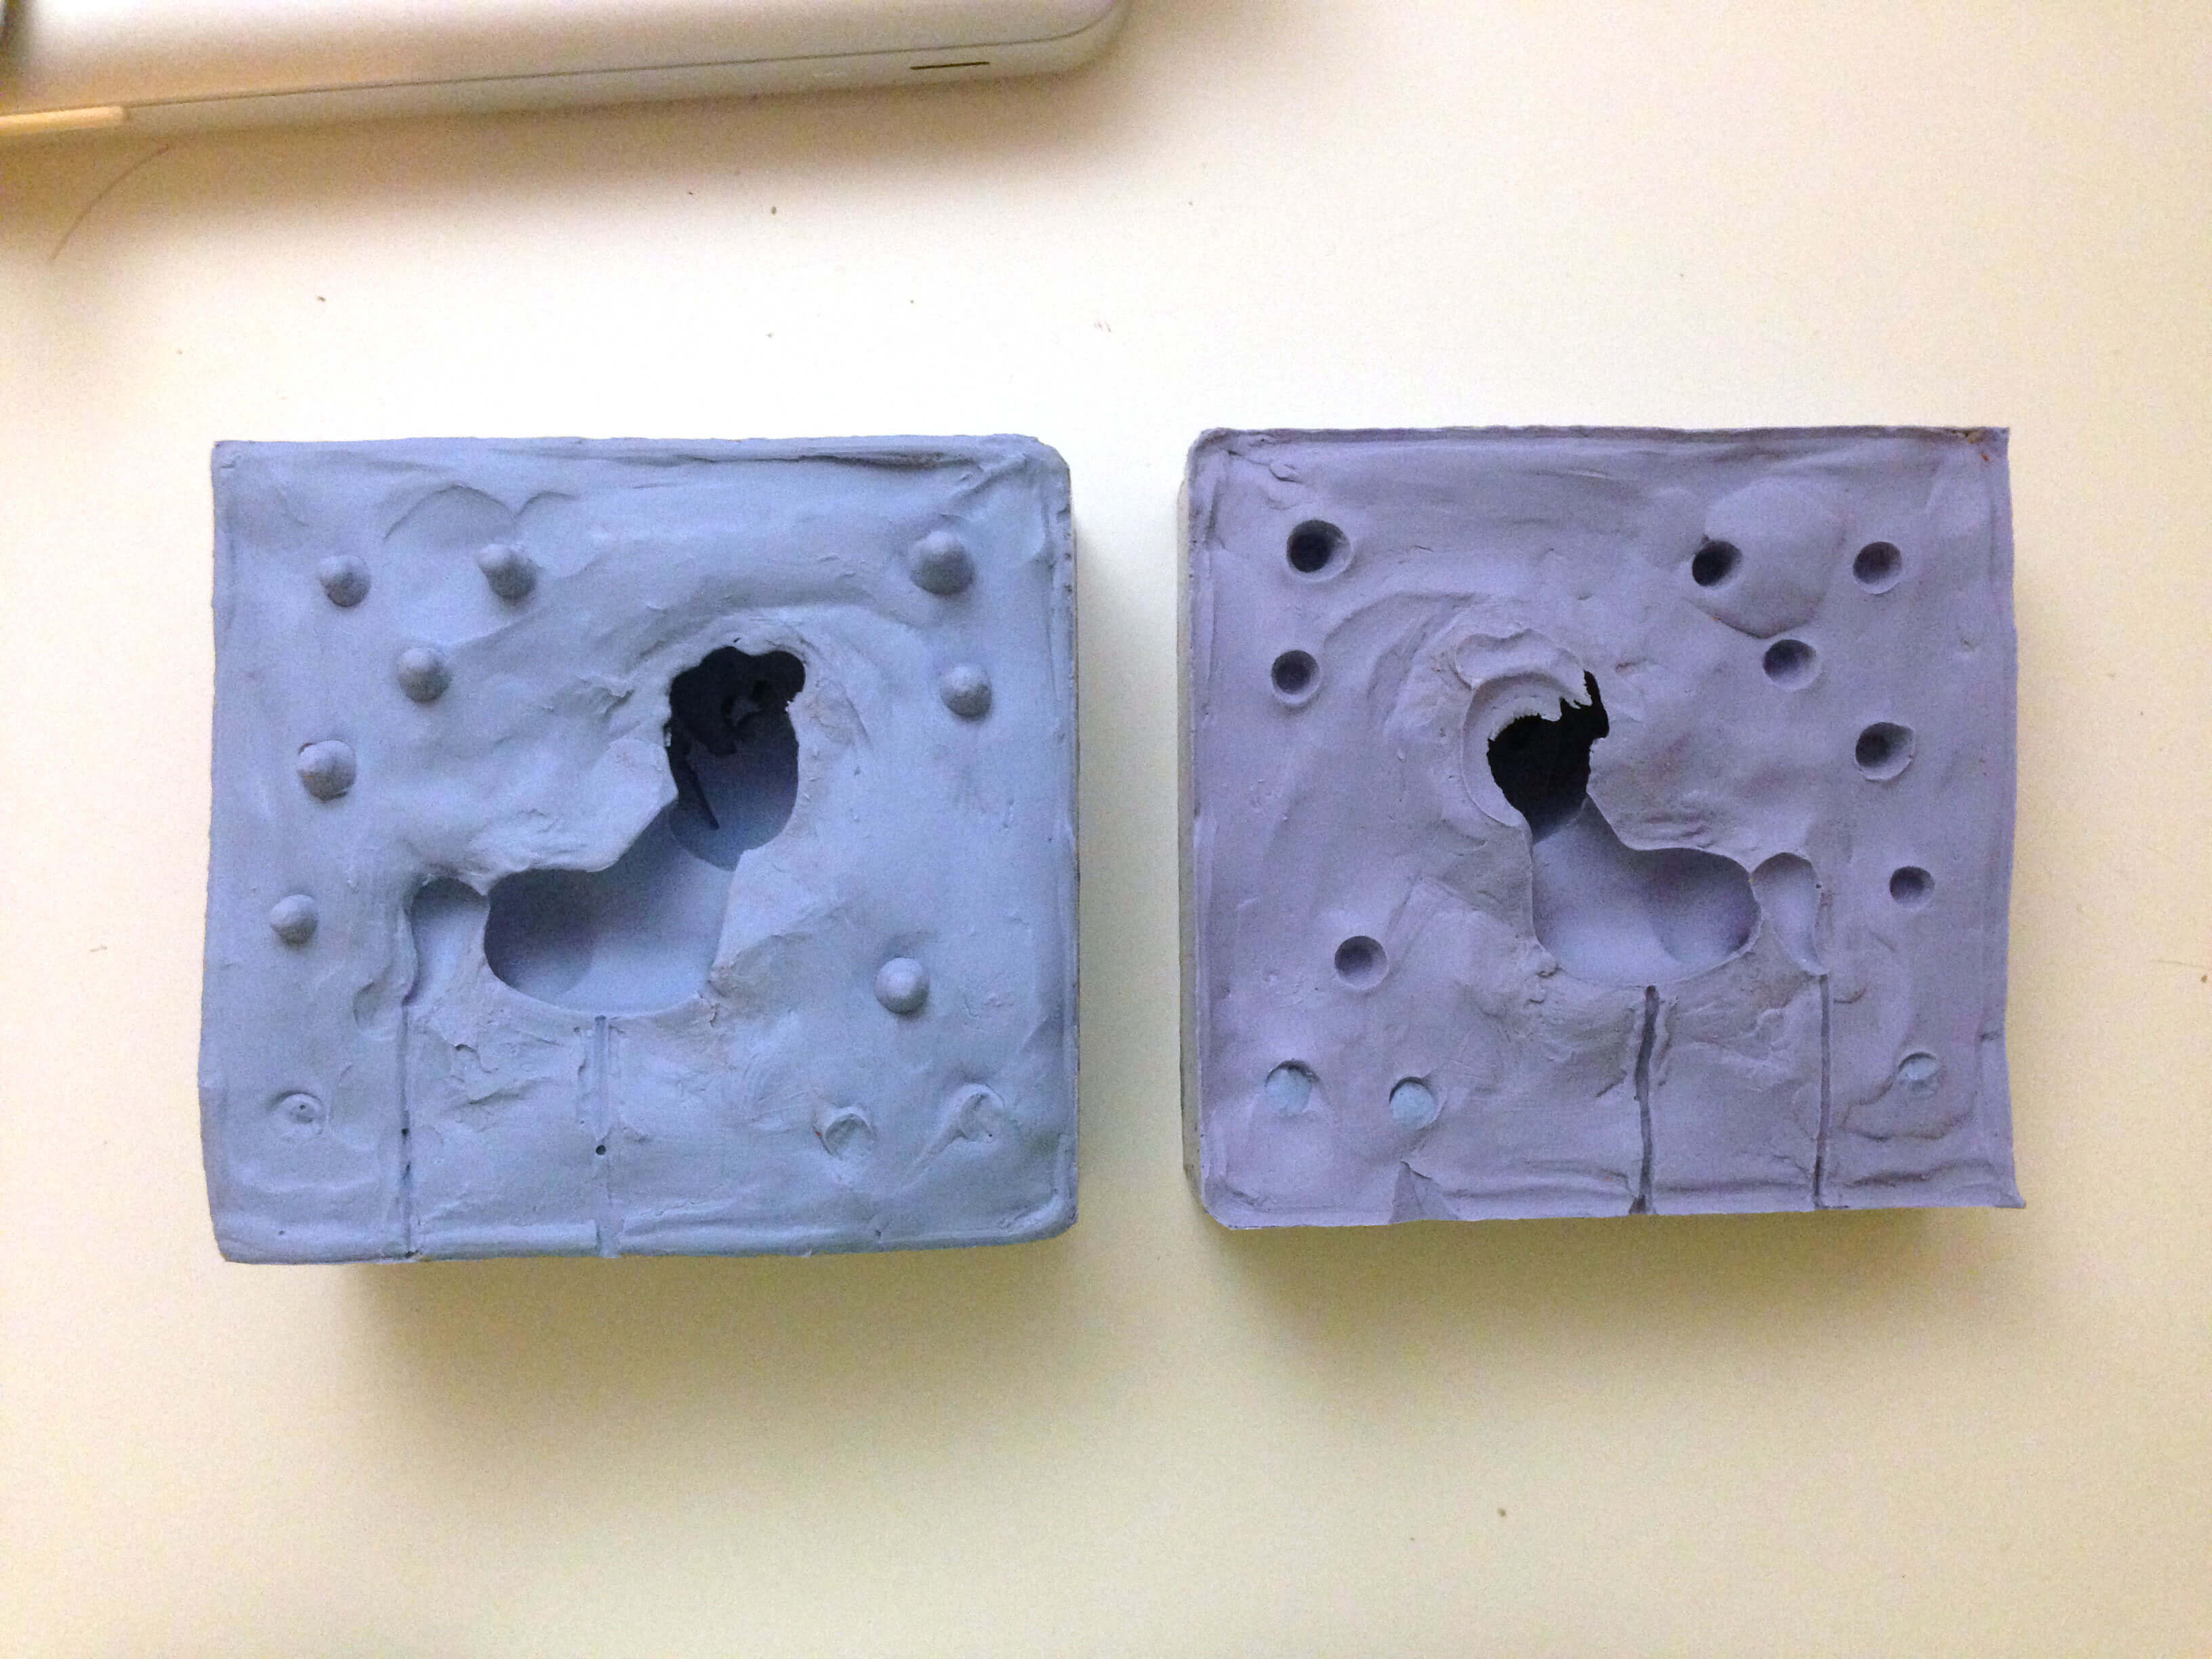
Notice that the two halves of my mold are a slightly different shade of purple. This is because my mixture was off a little. Oomoo is a little forgiving in that it will still solidify if you are a little off, but in the future I will be more precise in measuring my volume.

Firmly peel apart the two halves. They might seem REALLY stuck together at first. I freaked out because I thought the Ease Release didn’t work and I would have to cut my figure out. But I realized that I just wasn’t using enough force to pull it apart.
I did use an exacto knife to cut the mold where the pour funnels are so that I could remove my figure. It’s okay to make a few cuts like this to get your figure out. The silicone will spring back into its original shape as long as you don’t compromise the structure of your mold with too many cuts.
Clean out any bits of clay that may have gotten left behind in your mold, and voila! You are now ready to make your first resin cast!